From project managers and web developers to QA engineers, stock traders, and freelancers, capturing the exact screen content quickly and accurately can significantly streamline workflows, enhance presentations, and improve communication. We’ll explore to ensure you capture exactly what you need, when you need it, with utmost precision and minimal fuss.
Screen Recording Methods
|
Feature
|
Screenpixel
|
Xbox Game Bar
|
Snipping Tool
|
PowerPoint
|
|
Installation
|
Required
|
Built-in
|
Built-in
|
Requires Office
|
|
Ease of Use
|
High
|
High
|
Moderate
|
Moderate
|
|
Selection Area
|
Flexible
|
Full Screen
|
Flexible
|
Flexible
|
|
Pros
|
High precision;
Quick sharing |
Convenient;
No installation needed |
Precise selection;
Editing options |
Direct integration with presentations;
Editing options |
|
Cons
|
Requires installation
|
Limited editing;
Full screen only |
Video captures limited to Windows 11
|
Limited features;
Requires Office |
This table provides a quick overview of the capabilities and considerations of each method for recording or capturing specific parts of your screen on Windows 10/11. Depending on your particular requirements—whether it’s the ease of sharing, the need for precise area selection, or the integration with other software—the right tool for you can vary. Each option offers unique advantages that can cater to different professional needs, from detailed project documentation to creating engaging instructional content.
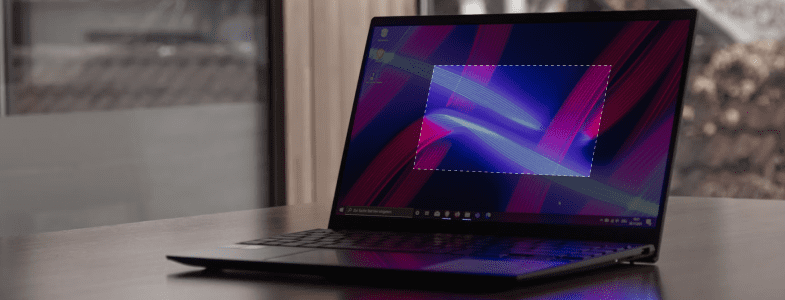
Part 1: Using Screenpixel for Partial Screen Recording
Screenpixel emerges as the premier solution for professionals looking to record specific parts of their screens on Windows 10/11. Its user-friendly interface, coupled with powerful features, makes it the go-to choice for those who need reliable and precise screen recordings.
Quick Installation
Getting started with Screenpixel is straightforward. Visit Screenpixel's official website to download the software. The installation process is designed to be quick and simple, ensuring you're ready to start recording in no time. This ease of setup is crucial for professionals who value their time and prefer to focus on their work rather than dealing with lengthy installations.
Simple Recording Process
Screenpixel simplifies the screen recording process to a few intuitive steps. Here’s how to use it:
-
Initiate Recording: Once Screenpixel is installed, you can start a recording session with a simple shortcut: press Ctrl+two mouse buttons simultaneously. This innovative approach eliminates the need for navigating through menus, saving precious time.
-
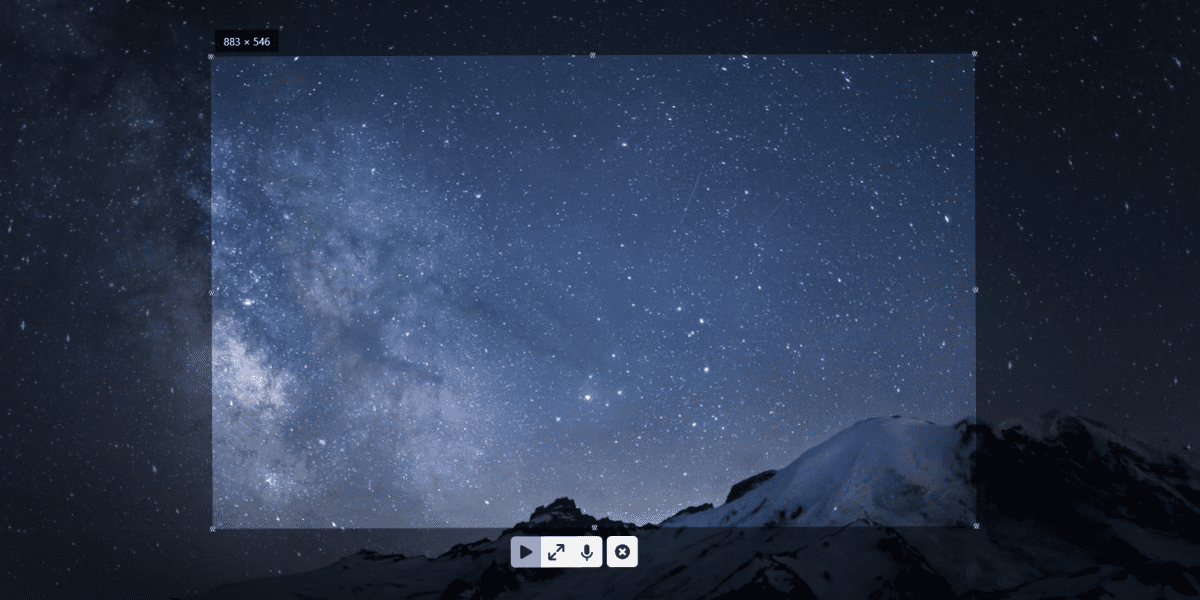
Select Your Screen Area: After activation, you're free to select the exact area of your screen you wish to record. Whether it's a small portion or a significant segment, Screenpixel allows for precise selection, ensuring that only the relevant content is captured.
-
Start Recording: With the desired area selected, the recording begins with just a click. Screenpixel works efficiently in the background, allowing you to continue your tasks uninterrupted.
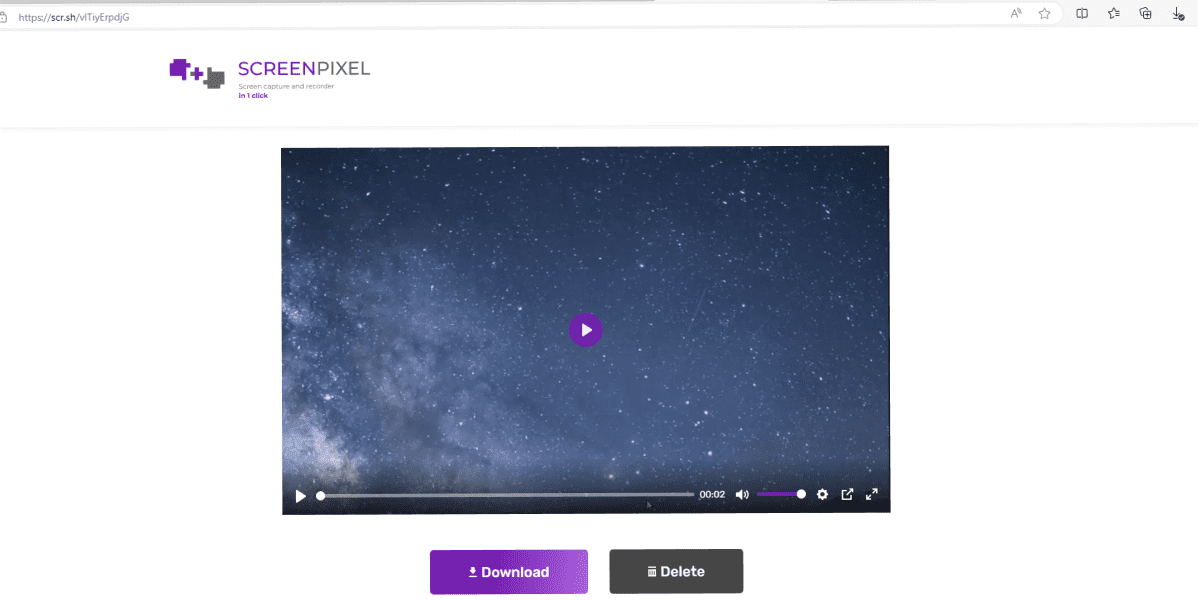
Efficient Sharing
One of Screenpixel’s standout features is its sharing capability. Once your recording is complete, Screenpixel provides a short link to the video clip. This feature is invaluable for professionals who need to share their recordings quickly, whether for collaborative projects, client presentations, or documentation purposes. The ability to instantly copy and distribute a link ensures that your recordings reach your audience without delay.
Part 2: Capturing Screen Content with Xbox Game Bar
The Xbox Game Bar on Windows 10/11 offers a built-in solution for recording screen content, including game footage and other types of media. While primarily designed for gamers, it’s a versatile tool that can help you record or capture a part of your screen on windows.
Activation and Use
-
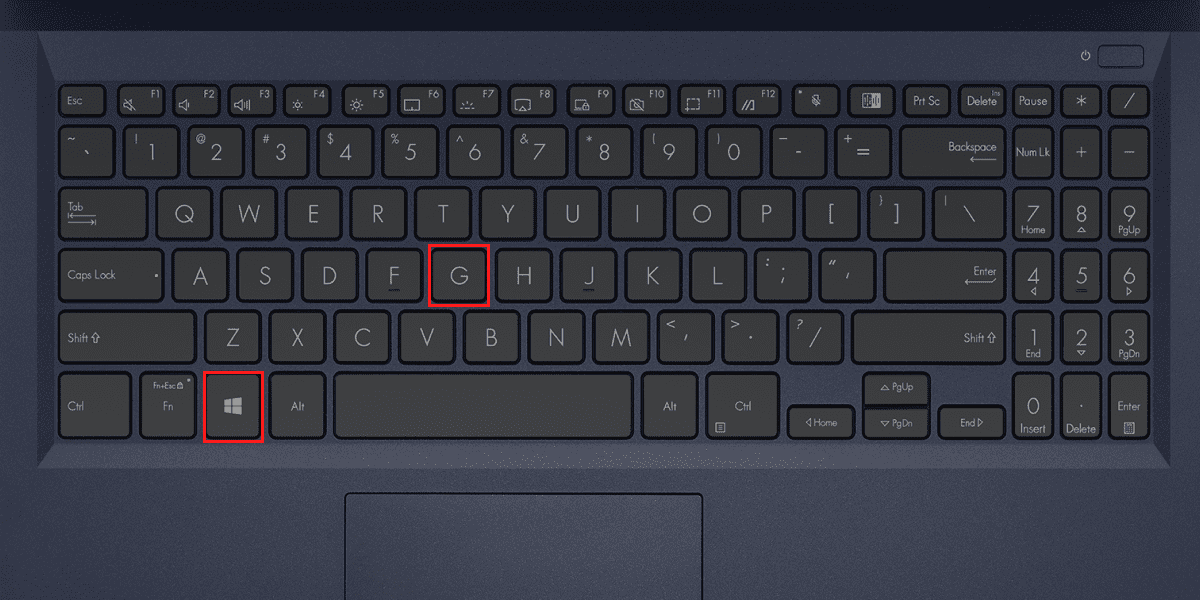
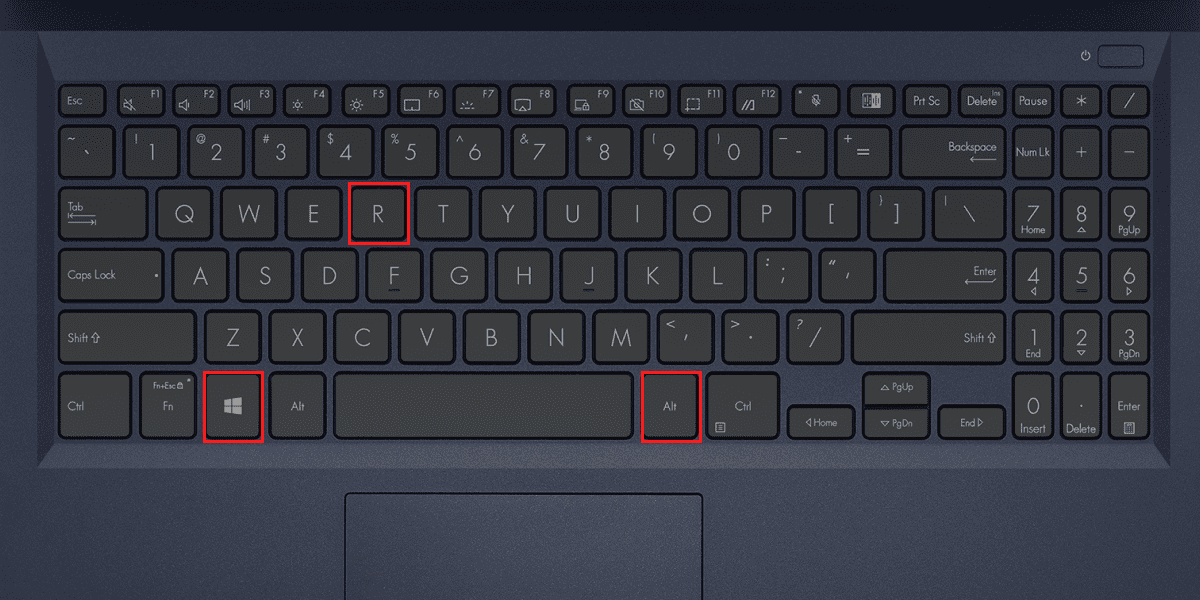
Open Xbox Game Bar: Press the Windows + G keys simultaneously to open the Xbox Game Bar. This shortcut brings up the overlay, which contains various widgets for screen recording, capturing screenshots, and monitoring system performance.
-
Start Recording: To record a part of your screen, first ensure the application window you wish to record is active. Then, click on the Start Recording button or press Windows + Alt + R to begin. While the Xbox Game Bar records the entire screen by default, you can use video editing tools post-recording to crop to the specific area you need.
-
Accessing Your Clips: Once you've finished recording, the clip is automatically saved in the Videos folder under Captures. You can then view, edit, or share your recording as needed.
Pros and Cons
-
Accessibility: As a built-in feature of Windows 10/11, it's readily available without the need for additional software installation.
-
Ease of Use: Simple shortcuts and an intuitive interface make it easy to start and stop recordings.
-
Integration: Works seamlessly with most applications and games, making it a versatile tool for various recording needs.
-
Limited Editing Features: The Xbox Game Bar is designed for straightforward recording, offering limited options for editing directly within the tool.
-
Full Screen Recording: Without native support for recording only a portion of the screen, additional steps are required to achieve partial screen recordings.
Part 3: Capturing Video with the Snipping Tool in Windows 11
Windows 11 introduces an upgraded Snipping Tool that goes beyond static screenshots, offering capabilities for video recording. This enhancement is a game-changer for users looking to capture dynamic content directly from their screens.
How to Record Videos Using the Snipping Tool
-
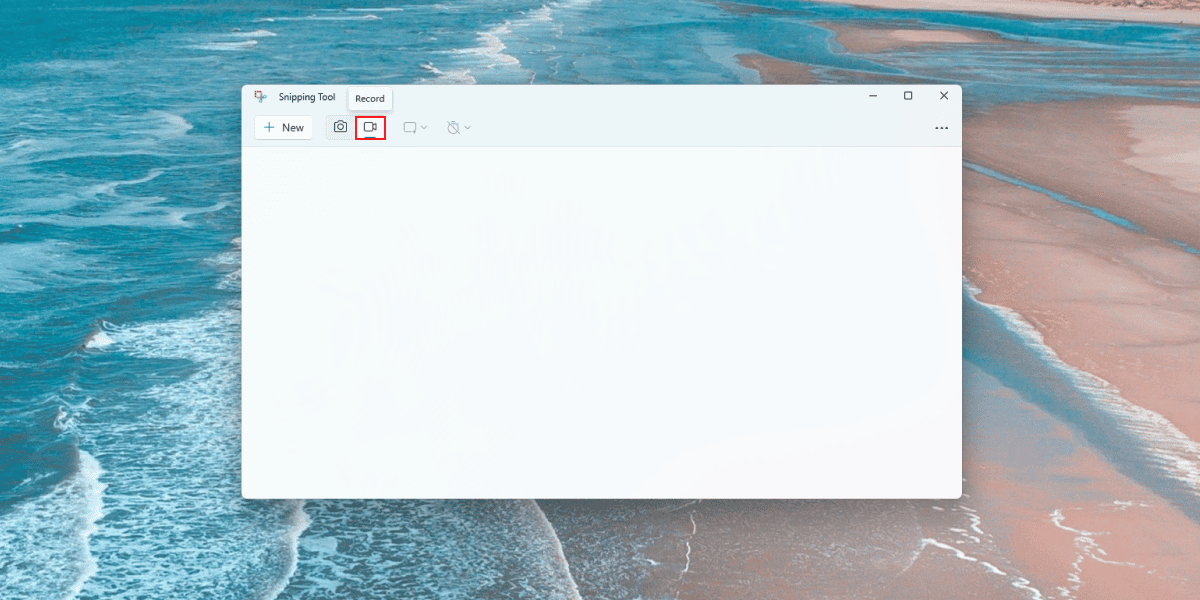
Accessing the Tool: Open the Snipping Tool from the Start Menu. This method remains consistent with its traditional use for static screenshots.

-
Initiating Video Capture: Instead of using the Windows + Shift + S shortcut, which is for screenshots, open the Snipping Tool and click on the Record button in the top toolbar, then press New to switch from screenshot mode to video capture mode.

-
Selecting Capture Mode and Recording: Once in video capture mode, click and drag your mouse to define the area of your screen you wish to record. After selecting the area, click Start to begin your recording. A 3-second countdown initiates before the recording starts, allowing you to prepare for the capture.
-
Editing and Sharing: After recording, the Snipping Tool allows you to preview your video. While the editing options are basic, you can trim your recording to the desired length before saving or sharing it directly from the tool.
Pros and Cons of Video Capture with Snipping Tool
-
Versatility: Captures both static screenshots and video, making it a multifunctional tool for various content creation needs.
-
Convenience: Easily accessible and simple to use, enhancing productivity and workflow efficiency.
-
Integrated Editing: Basic video editing features allow for straightforward trimming of your recordings.
-
Basic Editing Features: The editing capabilities are limited compared to specialized video editing software.
-
Exclusive to Windows 11: This updated functionality is only available in Windows 11, not accessible to users of earlier Windows versions.
By leveraging Windows 11’s Snipping Tool for both video recordings and precise static captures, users have a powerful, integrated solution for screen capture needs. This tool stands out for its ease of use and versatility, catering to a broad spectrum of content creation requirements.
Part 4: Leveraging PowerPoint for Screen Recording
PowerPoint, widely known for presentations, also features a surprisingly effective screen recording tool, making it a versatile option for capturing specific parts of your screen. This functionality is especially useful for creating tutorials, demonstrations, or any content where you need to incorporate video captures into presentations.
How to Record
-
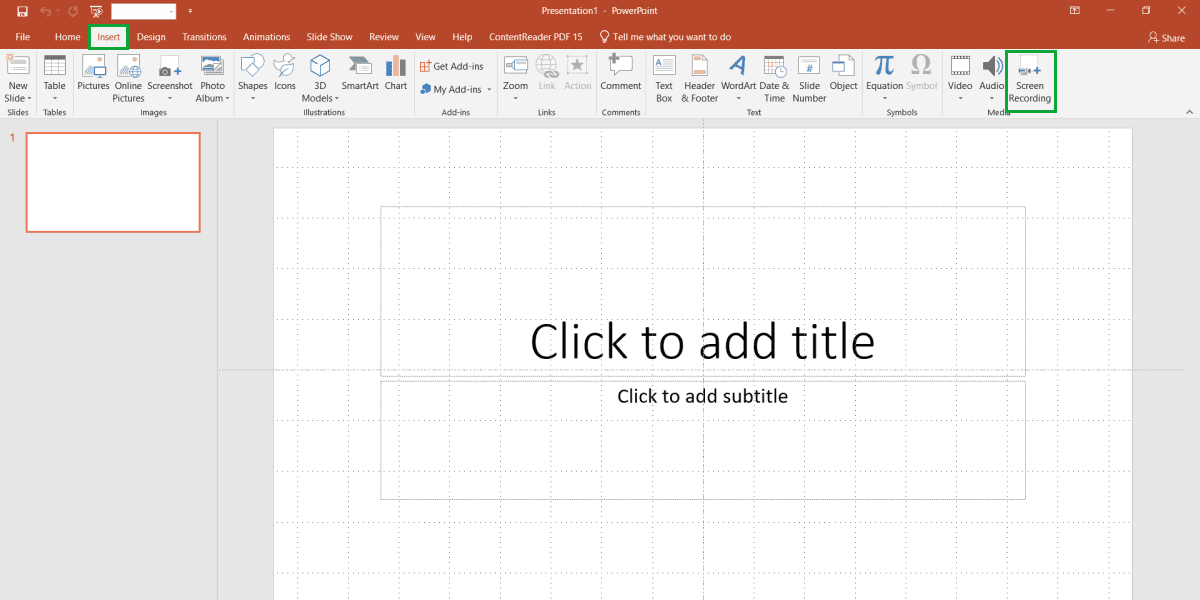
Open PowerPoint: Start by opening PowerPoint and creating a new slide where you want to insert your screen recording.
-
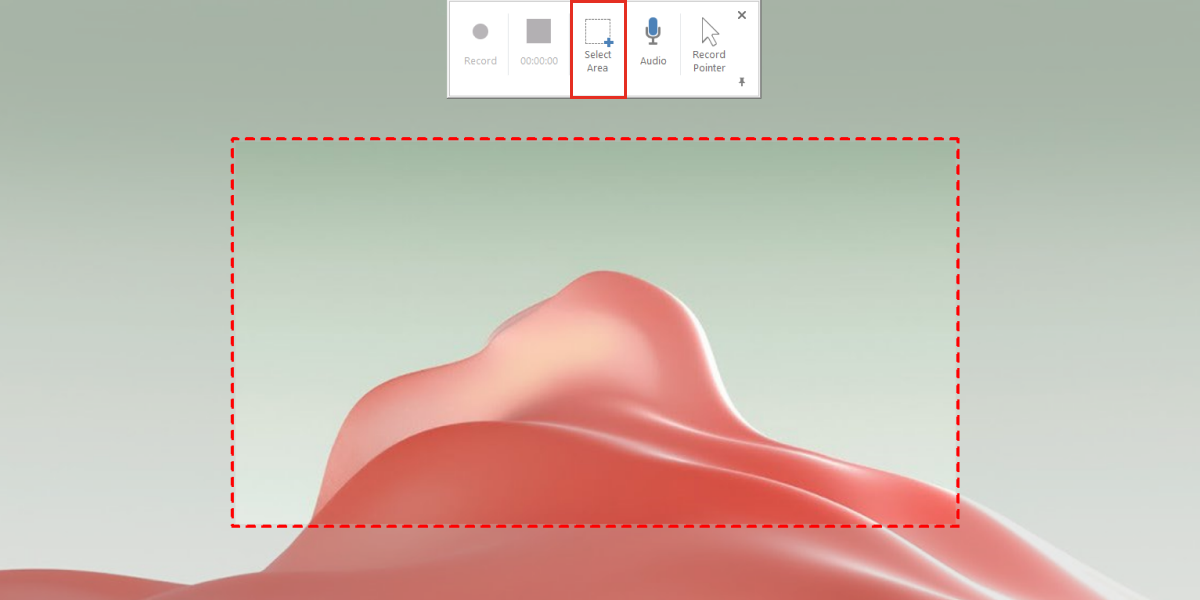
Select Screen Recording: Navigate to the Insert tab on the ribbon, click on Screen Recording on the far right. PowerPoint minimizes, and a control dock appears at the top of your screen, indicating you're in screen recording mode.
-
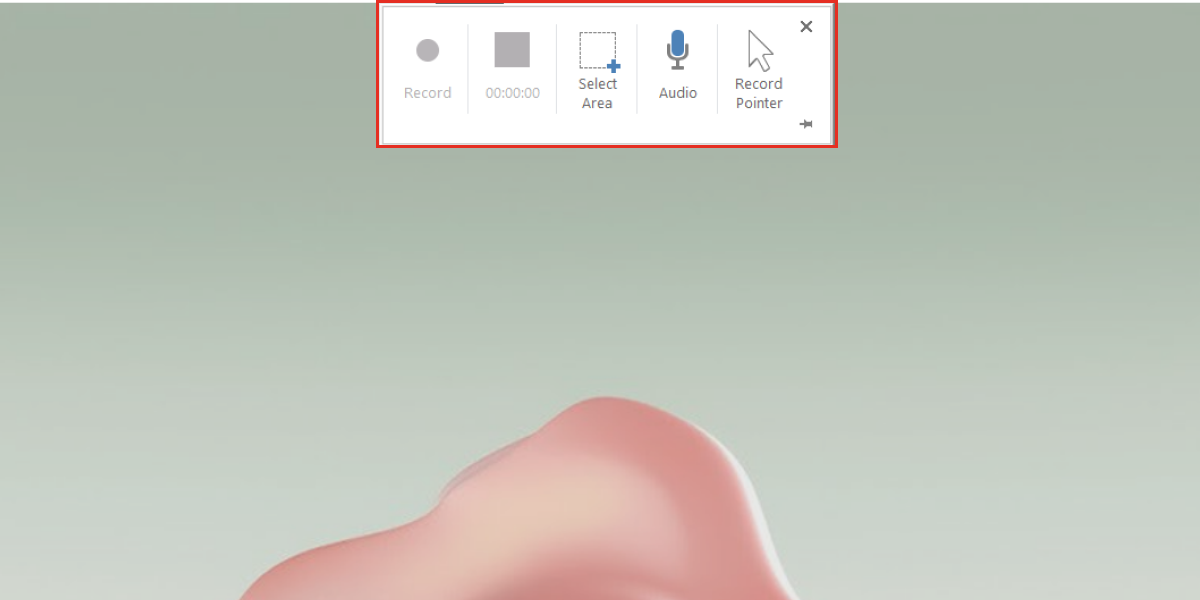
Choose Your Area: Click Select Area on the control dock. Your cursor becomes a crosshair, allowing you to select the specific part of your screen you wish to record. This feature is particularly useful for focusing on just the content you need without additional editing.
-
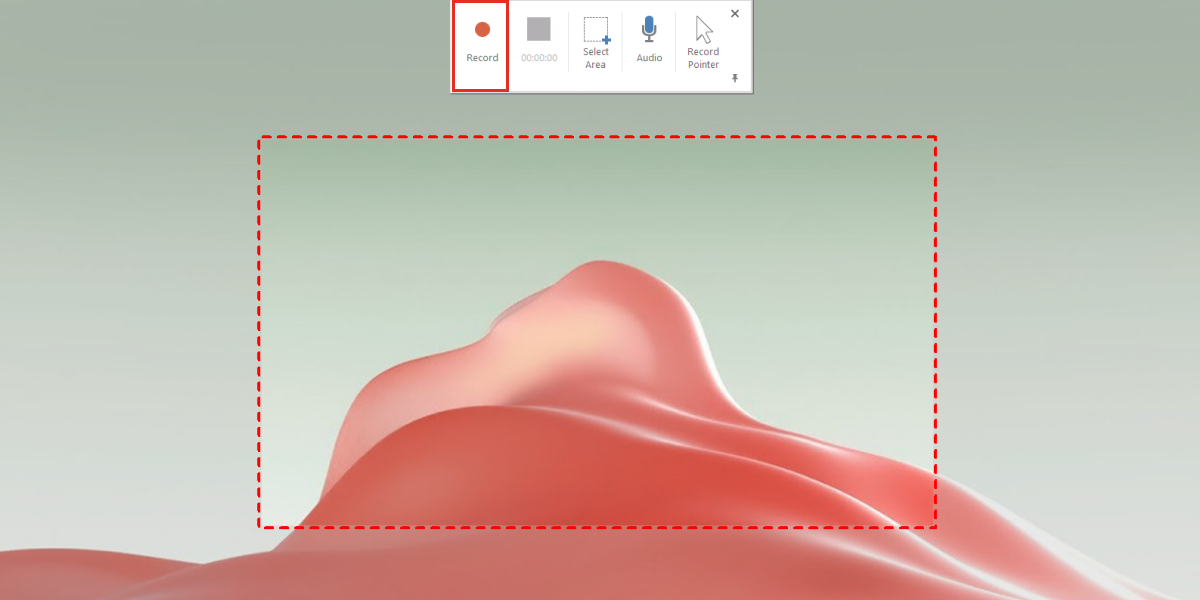
Start Recording: Once you've selected your area, click Record. There's a brief countdown, then your recording starts. During recording, you can pause and resume as needed.
-
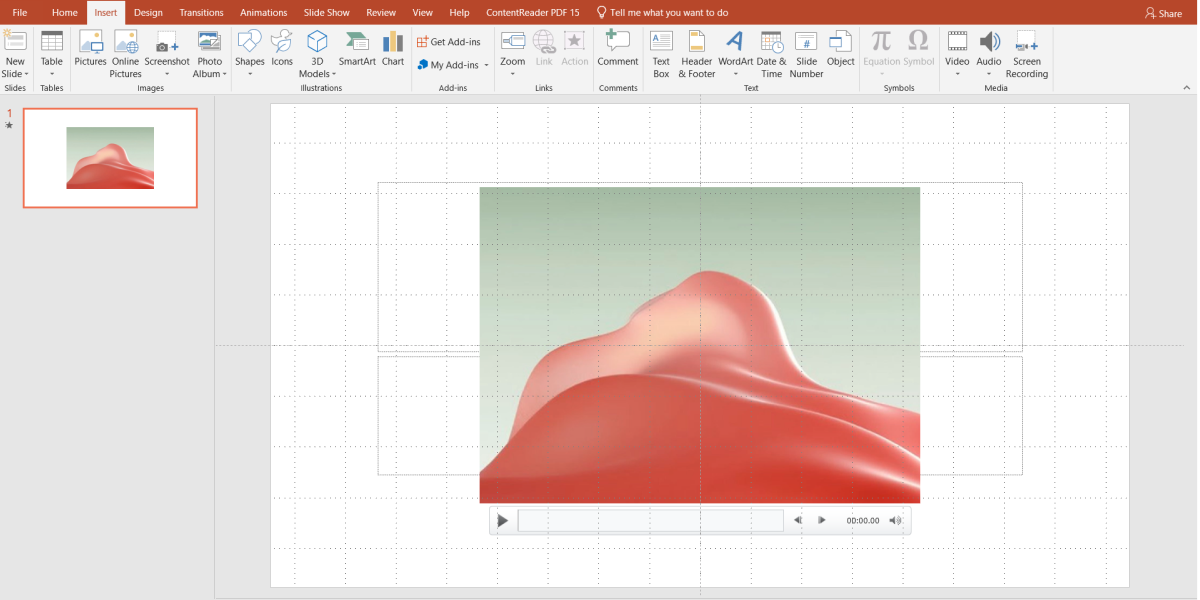
Insert Recording into Slide: After stopping the recording, PowerPoint automatically inserts the captured video into the active slide. You can then edit the video within PowerPoint, trimming, adding captions, or incorporating it into your presentation as needed.
Pros and Cons
-
Ease of Integration: Directly integrates screen recordings into your PowerPoint presentations, streamlining the creation of multimedia content.
-
Selective Recording: Allows for precise selection of the recording area, ideal for focusing on specific content.
-
Editing Capabilities: Provides basic video editing tools within PowerPoint, making it easy to refine your recordings before finalizing your presentation.
-
Limited to Office Users: Only available to those with Microsoft Office installed, potentially excluding users who do not have access to the software.
-
Basic Recording Features: While convenient for integrating into presentations, it lacks advanced recording features found in dedicated screen recording software.
Conclusion
To effectively record part of the screen on Windows, professionals and casual users alike often seek out the most efficient methods. Whether you’re looking to record a part of your screen for a tutorial, capture part of the screen for a presentation, or need to video capture part of the screen for a project, the right tool can make all the difference. Windows offers built-in solutions like the Xbox Game Bar, but for those who need to record certain parts of the screen with more precision, third-party applications like Screenpixel provide enhanced control. By allowing you to record only part of the screen, these tools ensure that your content is focused and free from unnecessary distractions. Moreover, when the requirement arises to record a specific part of the screen, the ability to select precisely what to capture ensures that your videos are exactly as needed, tailoring content to your audience’s interests. This flexibility is essential for creating engaging and relevant material, whether for educational, professional, or personal use.
FAQ
-
How do I record a specific part of my screen on Windows 10/11?On Windows 10, you can use the Xbox Game Bar for quick access and basic recording features, or PowerPoint for integrating recordings into presentations. For more advanced features, Screenpixel is a robust third-party option. On Windows 11, in addition to these options, the Snipping Tool now offers both static capture and video recording capabilities, allowing for precise selection of the recording area.
-
What is the best method for partial screen recording on Windows?The optimal method depends on your specific needs:
● Screenpixel: Offers advanced screen recording features for comprehensive control.
● Snipping Tool (Windows 11): Provides high-precision for both static captures and video recordings, along with basic editing options. -
Why can't I find partial screen recording options in my Snipping Tool?In Windows 10, the Snipping Tool is designed exclusively for screenshots, lacking video recording capabilities. However, Windows 11 has updated the Snipping Tool to include video recording features, allowing you to capture dynamic content. If you're using Windows 10 and need to record video, consider alternatives like the Xbox Game Bar, Screenpixel, or PowerPoint's screen recording feature.
