Whether it’s capturing a critical meeting, documenting a software bug, or creating instructional tutorials, screen recording on Lenovo devices offers a versatile solution to capture and share screen activity.
Method 1: Screen Record on Lenovo Laptop & Thinkpad with Screenpixel
Screenpixel offers a streamlined process for screen recording on Lenovo devices. Follow these step-by-step instructions on how to record a video on a Lenovo laptop:
-
Download and Install: Visit the Screenpixel website and download the Screenpixel application. Follow the installation instructions to get the software up and running on your Lenovo device.
-
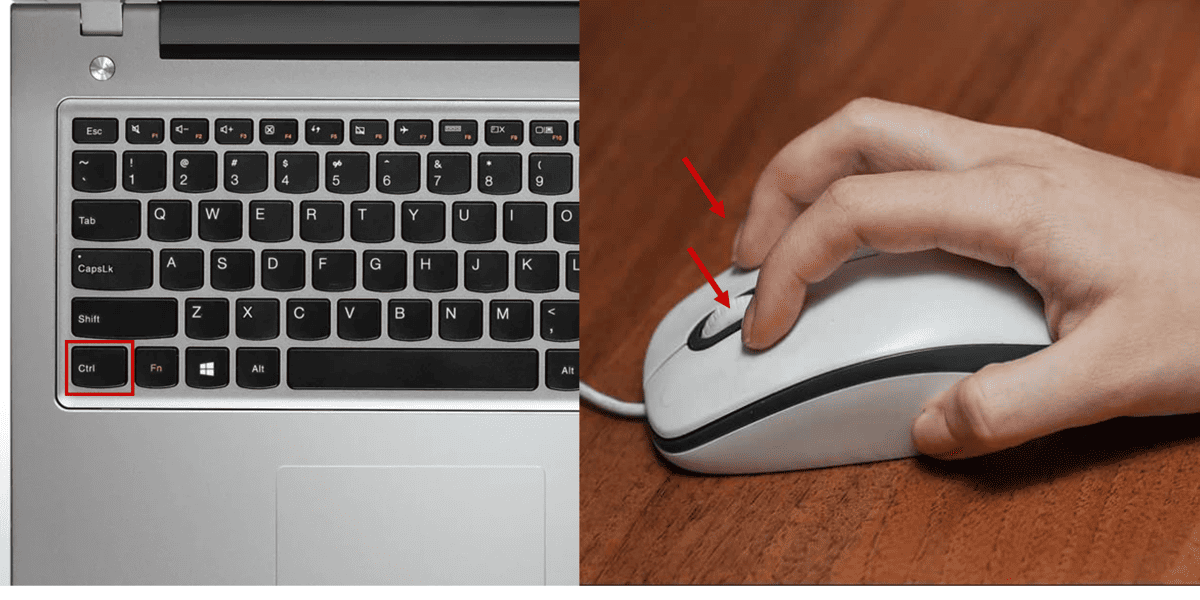
Start Recording: To initiate a screen recording, simply press the Ctrl key along with two mouse buttons simultaneously. A selection tool will appear, allowing you to choose the specific area of your screen that you wish to record.
-
Capture and Share: After selecting the desired area, Screenpixel will start recording your screen. Once you're done, press the Save Button to stop the recording. Instantly, a short link to your video will be generated and copied to your clipboard, ready for sharing with colleagues or friends.
-
Quick Installation: Screenpixel is designed for swift setup, ensuring you can start recording in no time.
-
Ease of Use: The intuitive control scheme (Ctrl + two mouse buttons) simplifies the recording process, making it accessible to users of all skill levels.
-
Instant Sharing: The automatic generation of shareable links for your recordings enhances collaboration and communication efficiency.
-
Requires Installation: Unlike some built-in tools, Screenpixel needs to be downloaded and installed before use.
Method 2: Record a Video using Lenovo Vantage in Windows
Lenovo Vantage is a software application designed to enhance the user experience on Lenovo devices, offering a range of system diagnostics, support, and customization options, including screen recording capabilities.
-
Access Lenovo Vantage: Lenovo Vantage comes pre-installed on most Lenovo PCs. You can access it by searching for "Lenovo Vantage" in the Windows start menu.
-
Utilize Screen Recording Feature: Within Lenovo Vantage, navigate to the "My Device Settings" tab and select "Display & Camera." Here, you'll find options for screen recording. Follow the on-screen instructions to capture your screen activity.
-
Seamless Integration: As a Lenovo-specific tool, Lenovo Vantage is seamlessly integrated into your device, offering a smooth user experience.
-
Easy Access: Being pre-installed on Lenovo devices, it's readily accessible without the need for downloading additional software.
-
Limited Device Compatibility: The screen recording feature is exclusive to Lenovo devices, which may not be suitable for users with other brands.
-
Variable Features: Depending on your device model and software version, the availability and functionality of the screen recording feature may vary.
Method 3: Record Your Screen with Snipping Tool (Windows 11)
The Snipping Tool in Windows 11 has been upgraded to include screen recording capabilities, making it a convenient option for capturing screen activity directly within the operating system.
Finding the Snipping Tool:
-
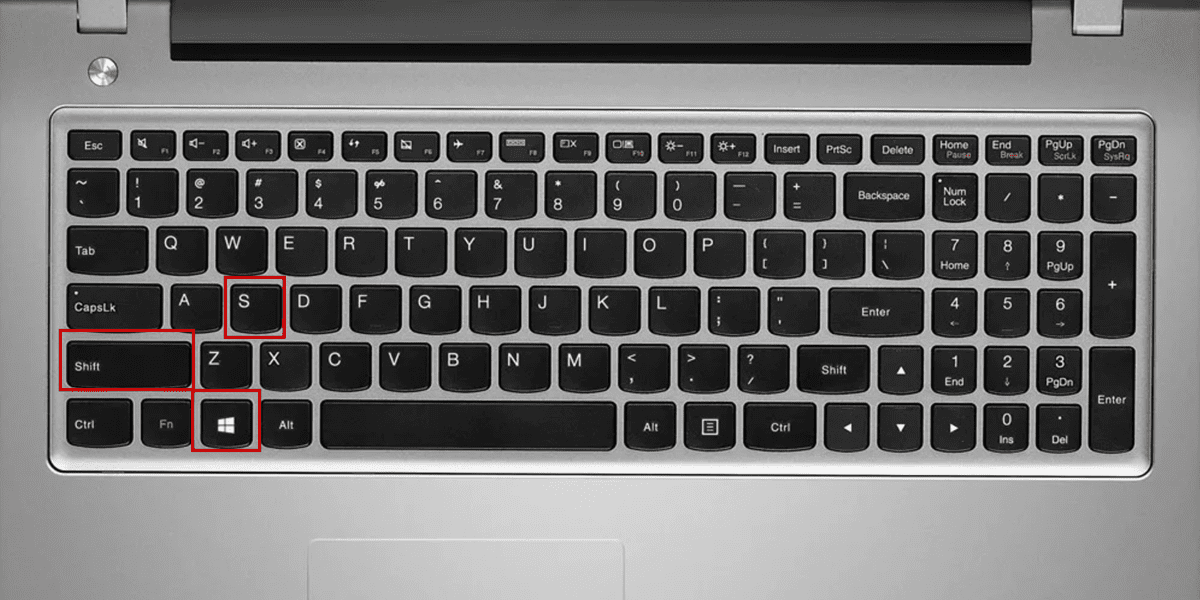
Press the Windows key and start typing "Snipping Tool." Click on the app to open it. Alternatively, you can also use the keyboard shortcut Shift + Windows + S to launch the tool directly.
Using the Snipping Tool for Screen Recording:
-
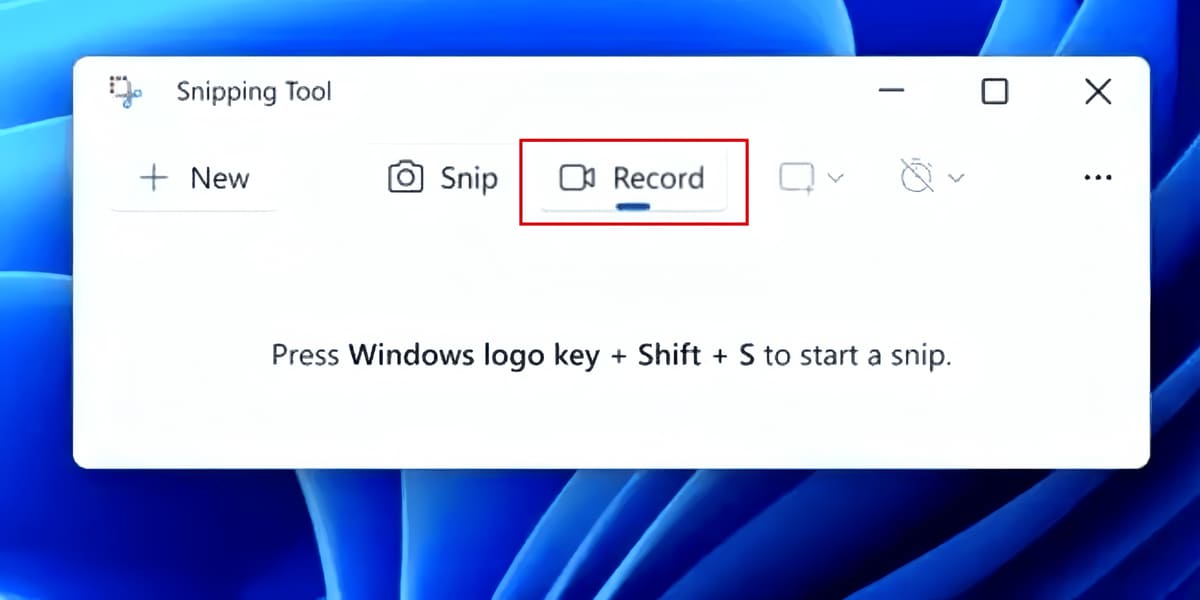
Within the Snipping Tool, select the "New" button to start a new capture.
-
Click the "Record" button to start recording your screen. If this is your first time using it, you might need to grant permission to record. A 3-second countdown will appear, after which the recording will start. You can select specific windows for recording or capture the entire screen.
-
Recording with Audio: For recording with audio, using built-in options like the Xbox Game Bar or third-party software like Screenpixel will be more effective, as the Snipping Tool is primarily designed for screenshots.
-
Built into Windows 11: No need to download or install additional software, making it readily accessible for quick screenshots.
-
Ease of Use: Simple and straightforward interface for taking quick recordings.
-
Only Available on Windows 11: Users on older versions of Windows will need to use alternative methods for screen capturing.
Method 4: You Can Use Xbox Game Bar on Lenovo PC
The Xbox Game Bar is a built-in feature in Windows 10 and Windows 11 that allows users to record game footage and take screenshots while playing. However, its functionality extends beyond gaming, making it a useful tool for screen recording.
Accessing Xbox Game Bar:
-
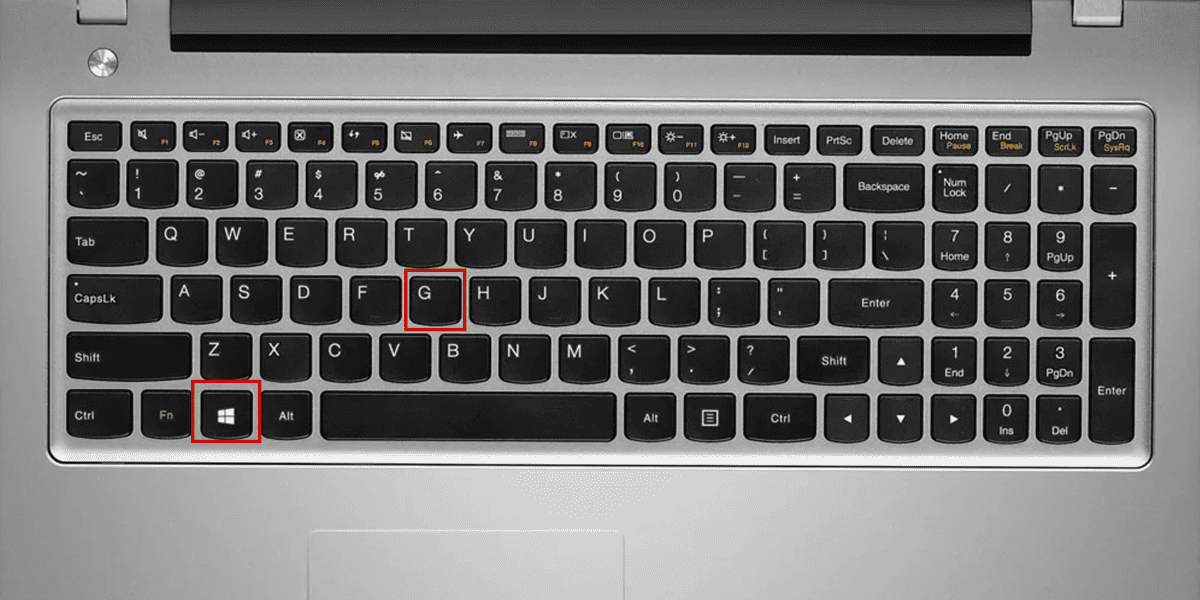
Press Windows + G to open the Xbox Game Bar. If it's your first time using it, you might need to enable it through the Windows Settings under Gaming.
Using Xbox Game Bar for Screen Recording:
-
Once the Xbox Game Bar is open, you'll see a variety of widgets. Click on the "Capture" widget to find screen recording options.
-
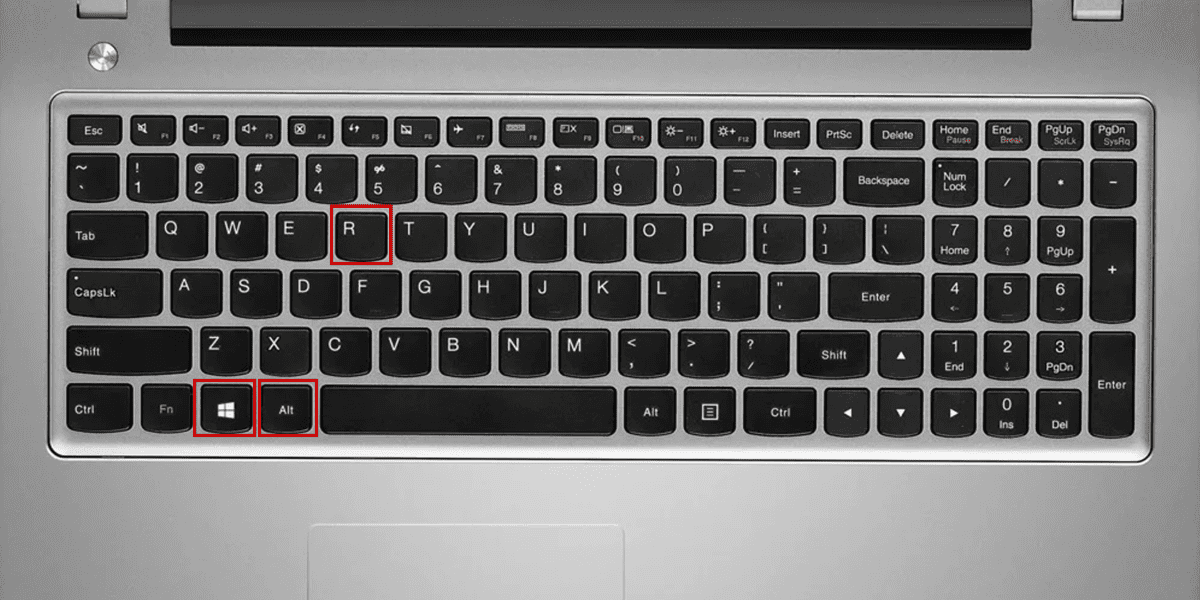
To start recording, click the "Start Recording" button (or press Windows + Alt + R). A small recording bar will appear, showing the duration of your recording.
-
To stop recording, click the stop button on the recording bar or use the same keyboard shortcut.
Customizing Settings for Optimal Recording:
-
In the Xbox Game Bar settings, you can adjust various options such as video quality, audio sources, and more to tailor the recording experience to your needs.
-
Pre-installed on Windows PCs: Ready to use without the need for additional software, providing a convenient option for Windows users.
-
Versatile: Though designed with gamers in mind, it's fully capable of recording any screen activity, making it useful for a wide range of applications.
-
May Not Be Intuitive for Non-Gamers: The interface and feature set are optimized for gaming, which might confuse users unfamiliar with gaming terminology.
-
Limited Editing Features: While excellent for capturing video, the Xbox Game Bar offers limited options for editing your recordings, potentially necessitating additional software for post-capture modifications.
Conclusion
Throughout this guide, we’ve explored several methods for screen recording on Lenovo laptops and Thinkpads, showcasing the versatility and accessibility of tools like Screenpixel, Lenovo Vantage, the Xbox Game Bar, and the Snipping Tool in Windows 11.
Screenpixel, in particular, stands out for its ease of use and reliability, offering a seamless experience for capturing screen activity with just a few clicks. Whether you’re a professional looking to document work-related tasks or a casual user aiming to capture moments for personal use, there’s a tool that fits your needs.
We encourage you to explore these options and select the one that best aligns with your screen recording requirements, ensuring high-quality captures every time.
FAQ
-
How Do I Record a video on Lenovo Laptop?To record your screen on a Lenovo computer, you have multiple options. You can use Screenpixel for a quick and easy setup with instant sharing capabilities. Lenovo Vantage offers integrated support for Lenovo devices, while the Xbox Game Bar provides a versatile solution for Windows users. Select the tool that best fits your needs based on the features and user experience you prefer.
-
How to Screen Record on Thinkpad?For Lenovo Thinkpad users, Screenpixel is a highly recommended option due to its simplicity and effectiveness. Simply download and install Screenpixel, and use the Ctrl + two mouse buttonsHow to Screen Record on Lenovo Laptop with Sound?To ensure your screen recording includes audio, make sure the recording tool you choose supports audio capture. Screenpixel and the Xbox Game Bar both allow for easy inclusion of system sounds and microphone input in your recordings. Check the settings of your chosen application to enable audio recording, ensuring your captures are both seen and heard.How to Take a Video on Lenovo Laptop with Built-in Tools?Lenovo laptops with Windows 10 or Windows 11 offer built-in tools for video capture, such as Lenovo Vantage and the Xbox Game Bar. Lenovo Vantage is specifically designed for Lenovo devices, providing an easy way to access and use the screen recording feature. The Xbox Game Bar, on the other hand, offers a more general solution for screen recording on any Windows PC, including Lenovo laptops. Access these tools directly from your operating system to start capturing videos without the need for external software.
