Windows PCs offer several methods to accomplish this, but none as quick and easy as using Screenpixel, a tool designed to streamline the process. This guide will walk you through the traditional methods and introduce you to Screenpixel, highlighting how to capture a screenshot on Windows with ease and speed, making the task more comfortable than ever.
How You Can Take a Screenshot on a Computer
|
Method
|
Shortcut/Tool
|
Capture Type
|
|
Screenpixel
|
Pressing two mouse buttons
|
Selectable area
|
|
Print Screen
|
PrtScn / Alt+PrtScn / Windows+PrtScn
|
Full screen / Active window / Auto save to file
|
|
Game Bar
|
Windows + G / Windows + Alt + PrtScn
|
Full screen / Selected window
|
|
Snipping Tool
|
Search "Snipping Tool"
|
Free-form, Rectangular, Window, Full-screen
|
|
Snip & Sketch
|
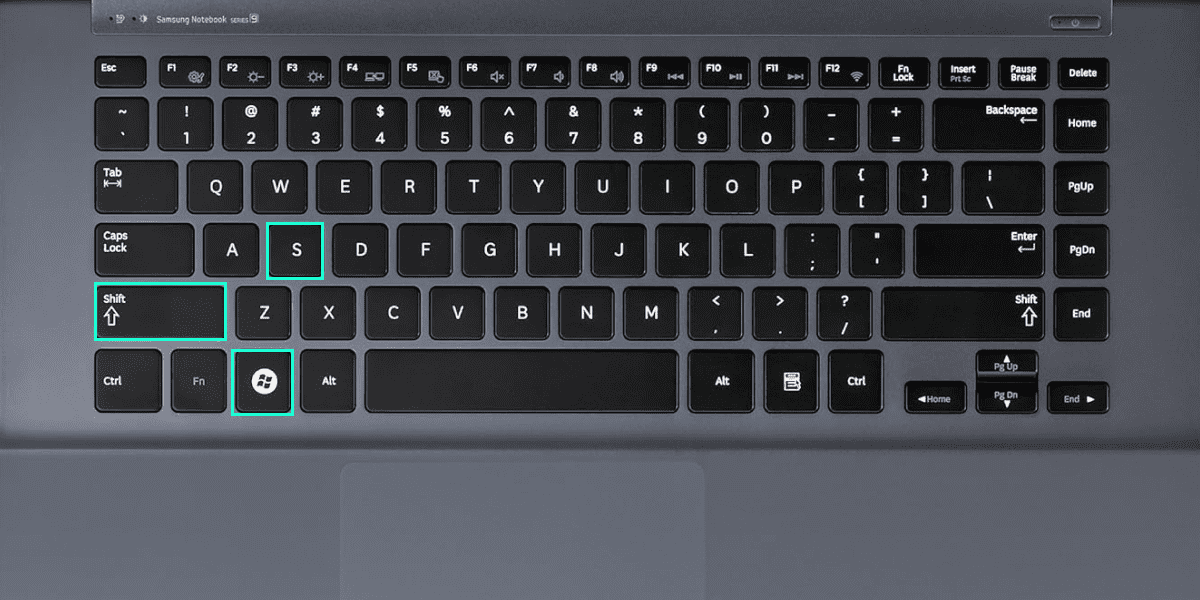
Windows + Shift + S
|
Free-form, Rectangular, Window, Full-screen
|
Way 1: Use Screenpixel to Capture a Screenshot
For those seeking a quick, easy, and efficient method to take screenshots, Screenpixel is the tool of choice. This software provides a dependable way to capture and share screen content. Here’s how to make a snapshot on PC using Screenpixel:
-
Download and install Screenpixel from screenpixel.org, a process that is swift and hassle-free.
-
Once installed, you can take a screenshot simply by pressing two designated mouse buttons. This action allows you to select the specific area of your screen you wish to capture.

-
After selecting the area, press Enter. Screenpixel then captures your selected snapshot and instantly saves it. But what sets Screenpixel apart is its next step: it automatically generates a short link to your screenshot, copying this link to your clipboard.
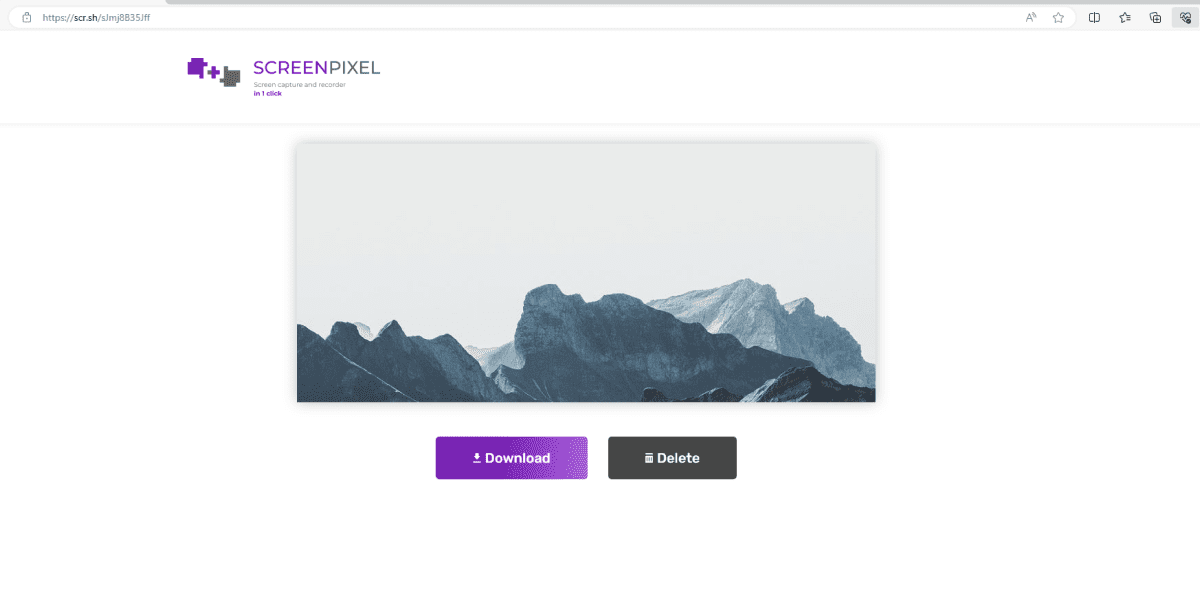
Whether you’re discussing a project on a webpage, examining code, or reviewing designs, Screenpixel streamlines the process, enabling you to send and share your screenshots without interrupting your workflow. Its quick installation, simple usage, and the ability to quickly share links make it a superior choice for professionals across various fields.
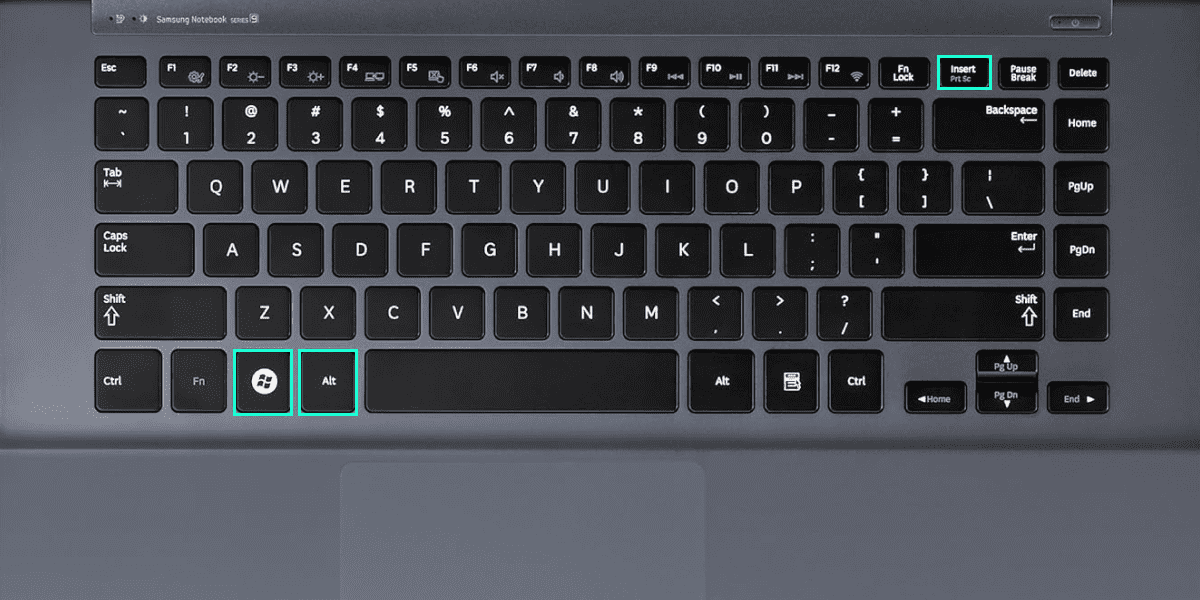
Way 2: Use the Print Screen Key/Shortcut
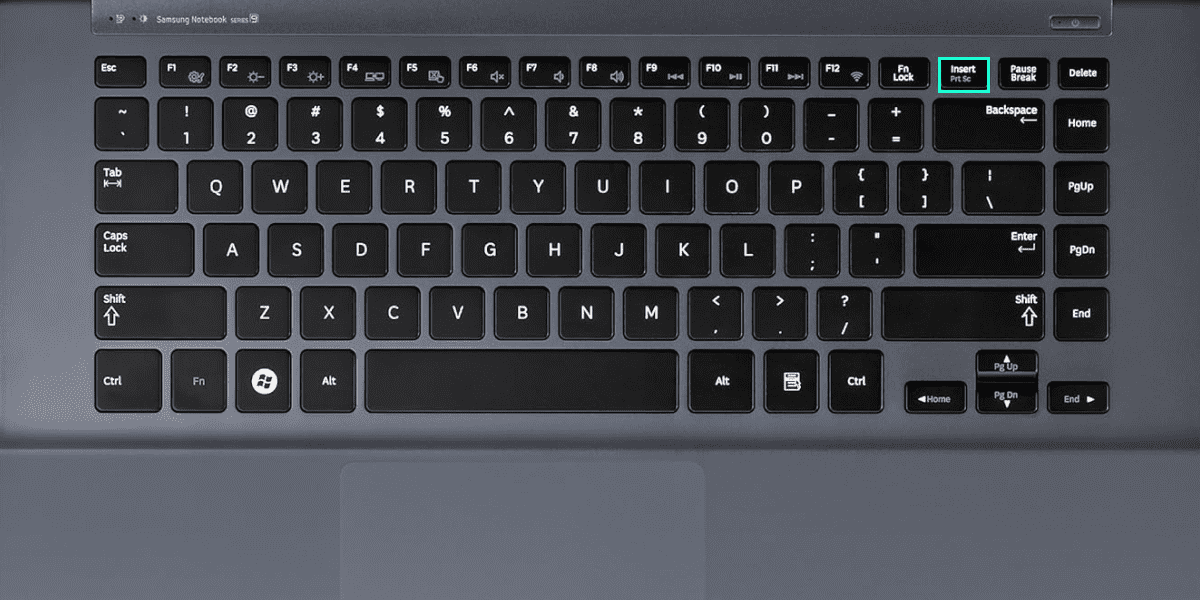
The Print Screen key, often abbreviated as PrtScn, is a quick way to capture the entire screen on your Windows PC. For those wondering how do you screenshot on a computer, this method is as straightforward as it gets. Here’s how to utilize it:
-
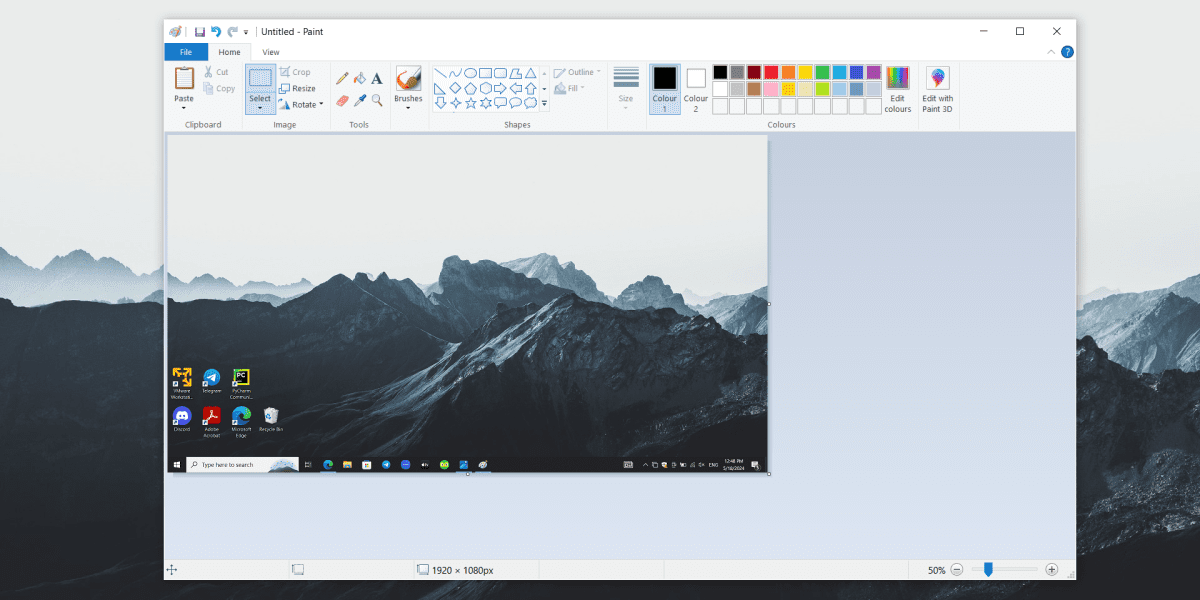
Simply press the PrtScn key to capture an image of your entire screen. This copies the screenshot to your clipboard, allowing you to paste it into any program that accepts images, such as Paint or Word.
-
If you wish to capture only the active window, press Alt + PrtScn. This snaps a shot of the window currently in focus and saves it to your clipboard.
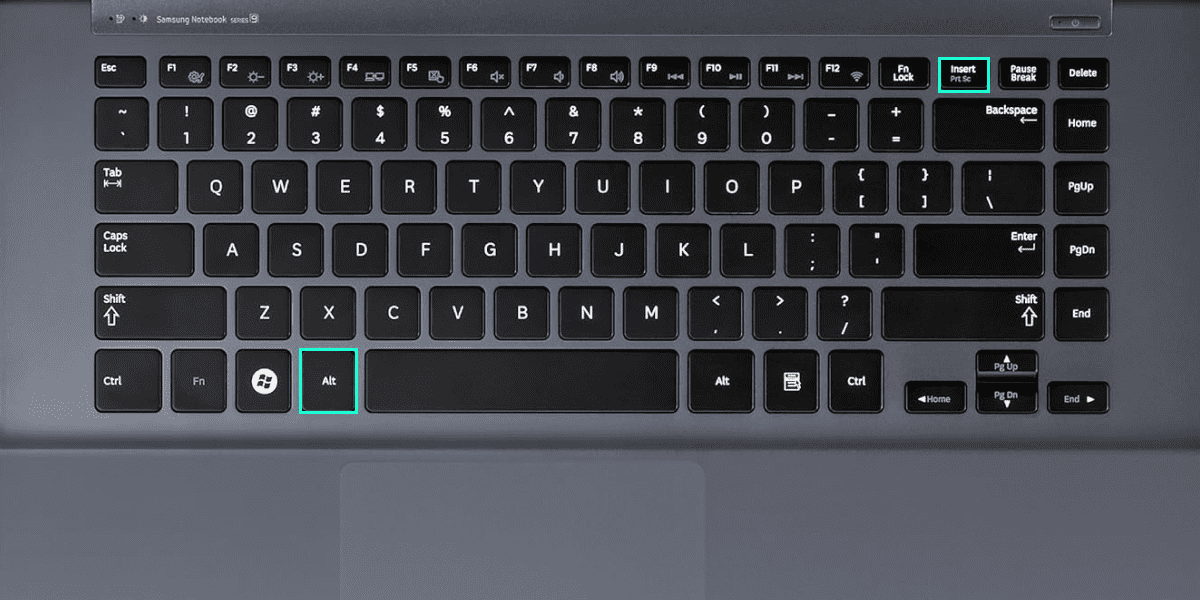
-
To save the screenshot directly as a file, press Windows + PrtScn. Your screen will briefly dim to indicate a successful capture, and the screenshot is saved automatically in the Pictures > Screenshots folder.
This method is ideal for quick captures, especially when you need to edit or share a snapshot with minimal delay. Whether you’re on a desktop or a laptop, mastering the Print Screen key is a valuable skill in your screenshot-taking arsenal.
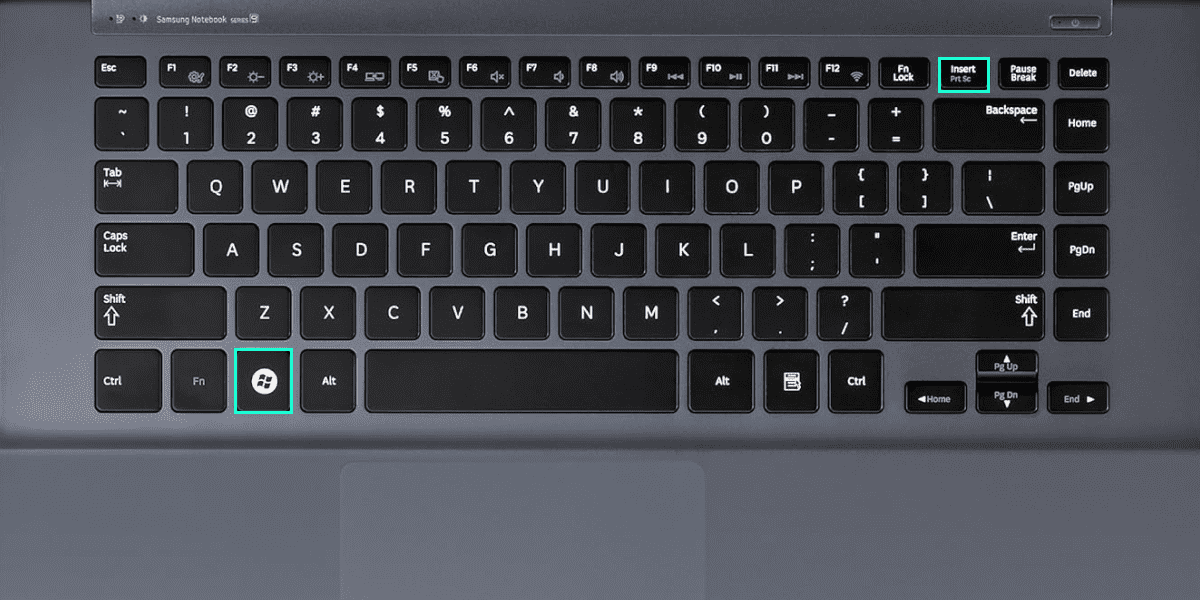
Way 3: Use the Game Bar to Capture a Screenshot on PC
For gamers and professionals who need to capture moments without leaving their application, the Windows Game Bar is an excellent tool. This feature is not only for recording gameplay but also for taking screenshots with ease. Here’s how to take screenshots on a Windows computer using the Game Bar:
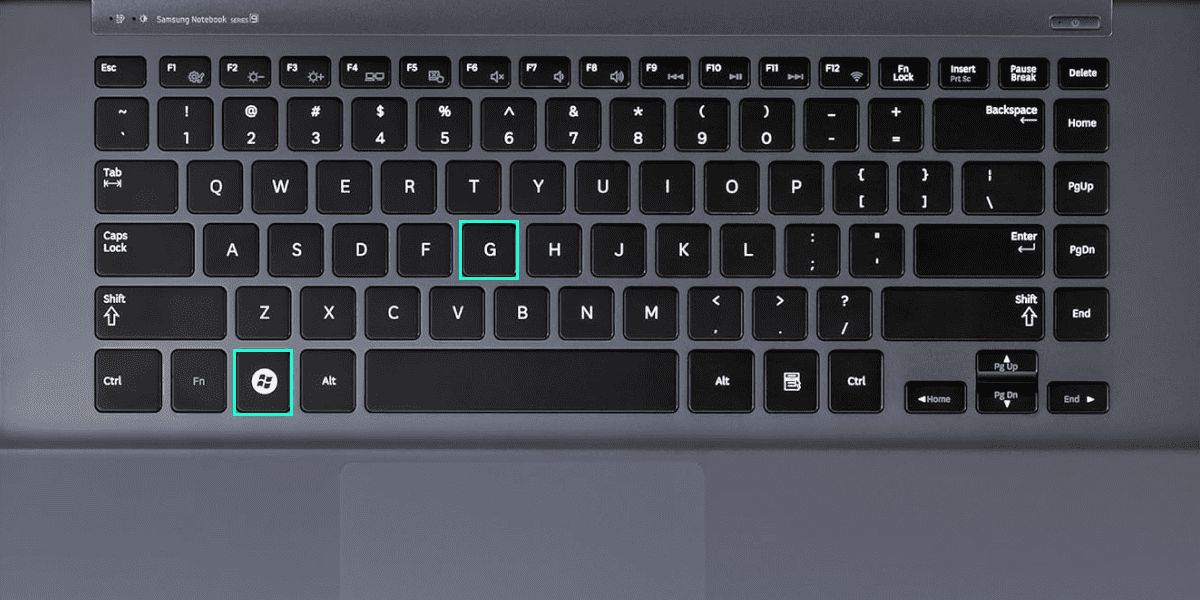
-
Press Windows + G to open the Game Bar. Ensure you've enabled Xbox Game Bar in your Windows settings under Gaming.
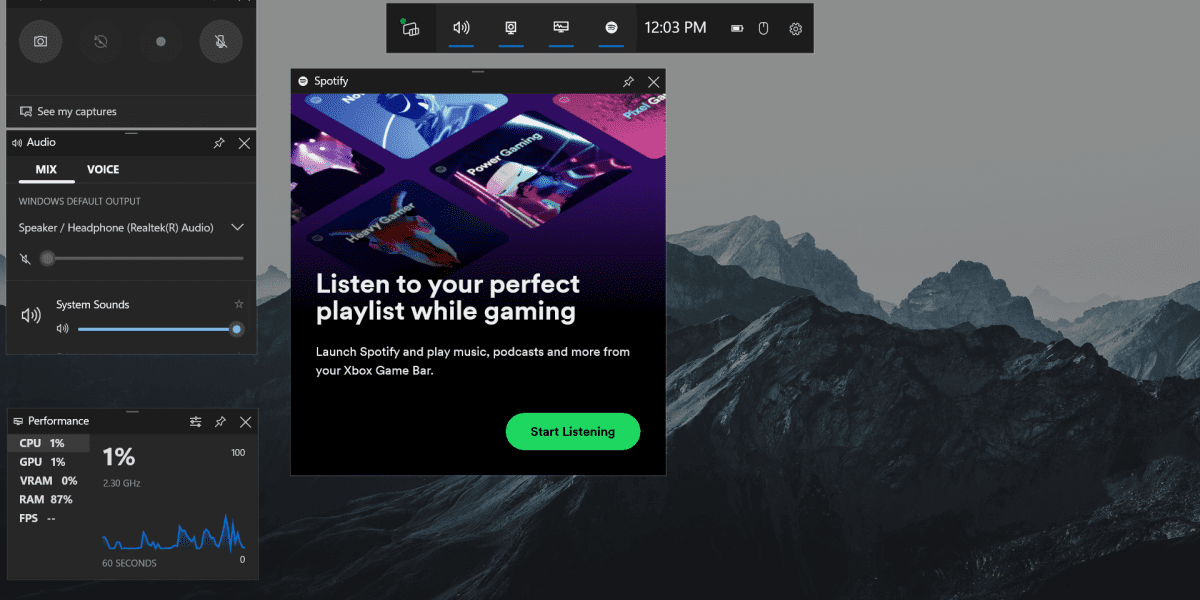
-
Click on the camera icon or press Windows + Alt + PrtScn to take a screenshot. You'll see a notification that your screenshot was saved.

-
All screenshots taken with the Game Bar are saved in the Videos > Captures folder. From there, you can edit, share, or send them as needed.
This method is particularly useful for capturing dynamic content, such as videos or games, on your PC. It allows for quick access and easy sharing options, making it a favorite among users who frequently capture and share their digital experiences.
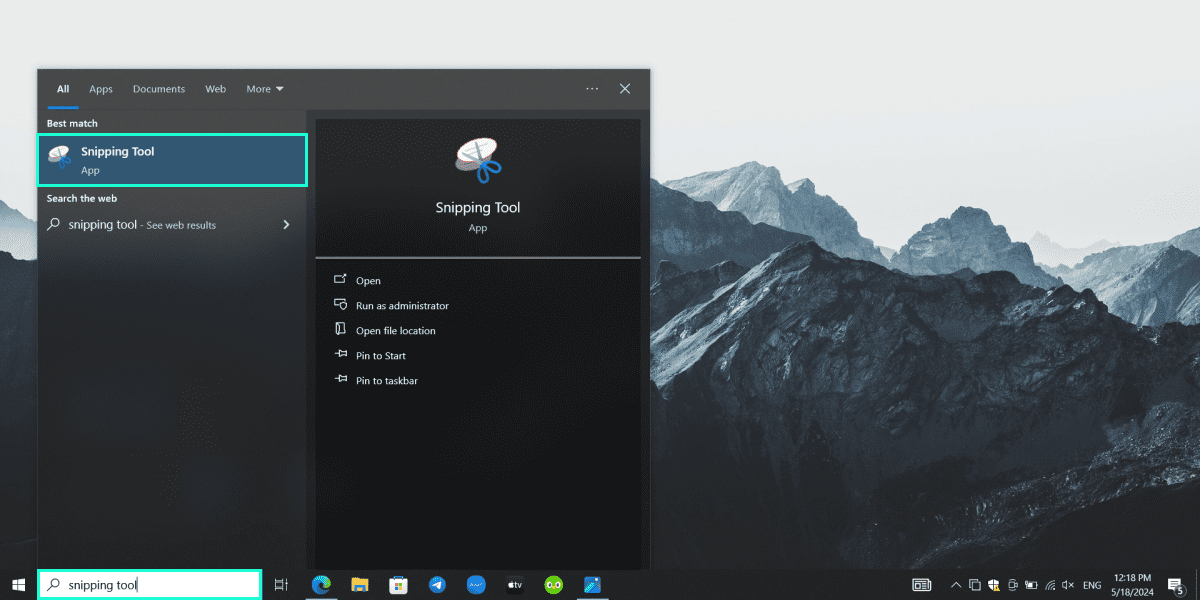
Way 4: Use the Snipping Tool to Get a Screenshot
The Snipping Tool is a long-standing Windows tool that offers more flexibility than the traditional Print Screen approach. It allows users to capture screenshots in various shapes and sizes, providing more control over what you take a snapshot of. Here’s how to create a screenshot on PC using the Snipping Tool:
-
Search for the Snipping Tool in your Windows search bar and open the application.
-
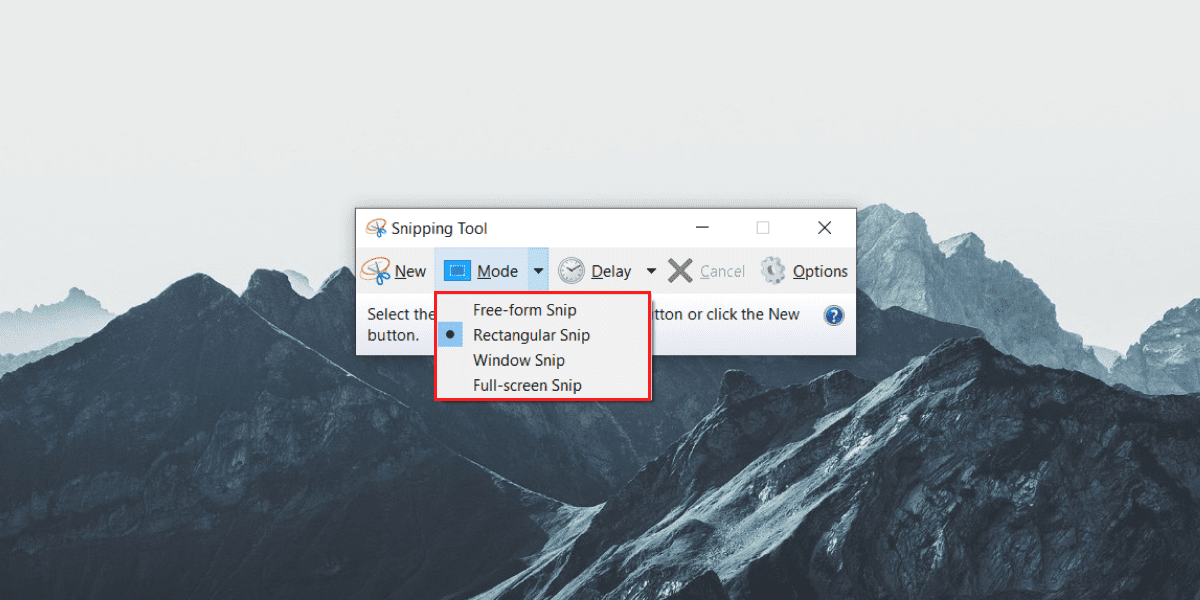
Choose the type of snip you want to make: Free-form, Rectangular, Window, or Full-screen. Each option offers a different way to capture parts of your screen.
-
Once you've made your selection, your screen will fade, and you can select the area you wish to capture. For free-form and rectangular snips, click and drag your mouse over the area. For window and full-screen snips, simply click on the window or let the tool capture the full screen.
-
After capturing the screenshot, the Snipping Tool opens an editing window where you can annotate, save, or share your snap.
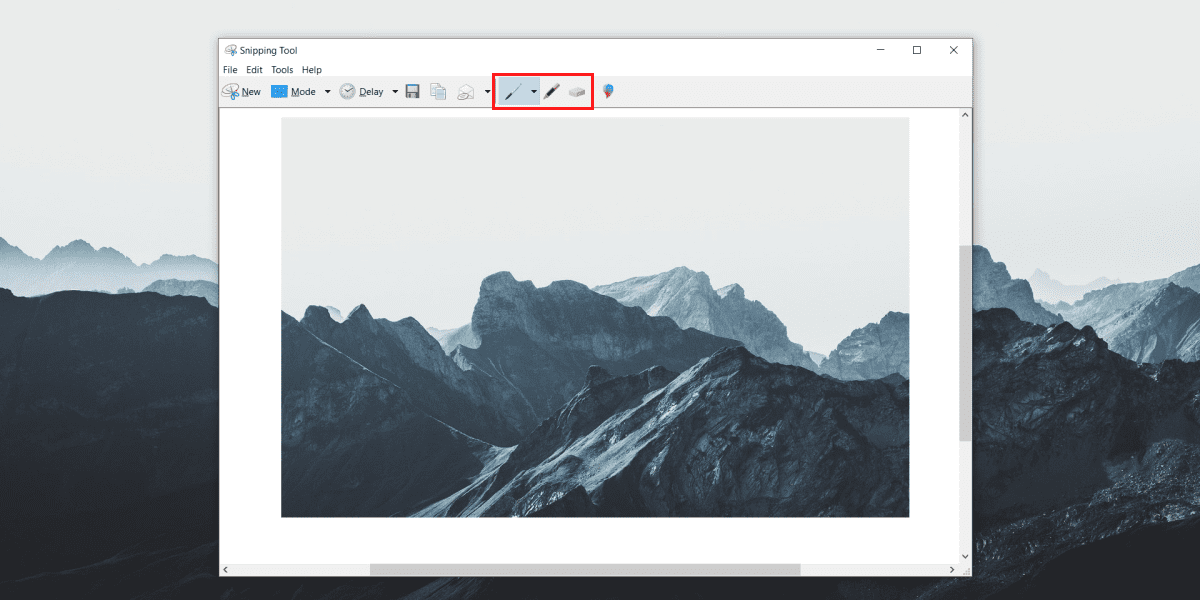
This tool is ideal for users who need to capture specific parts of their screen and might want to edit or annotate their screenshots before saving or sending them. It’s versatile for both desktop and laptop users who capture everything from webpages to software interfaces.
Way 5: Use Snip & Sketch to Do a Screenshot
Snipping Tool is the updated version of Snip & Sketch, designed to take, edit, and share screenshots more easily. This tool is integrated directly into Windows 10 and above, offering a quick way to capture your screen with just a few clicks. Here’s how to take screenshots on a Windows computer with Snip & Sketch:
-
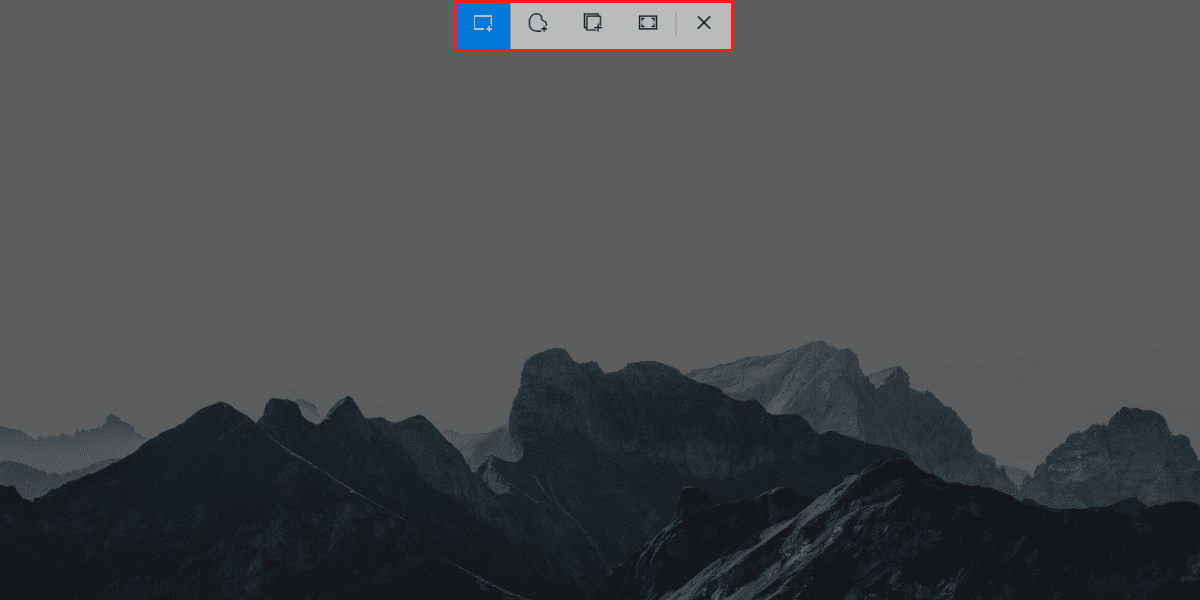
Press Windows + Shift + S to bring up the Snip & Sketch capture bar, which allows you to choose from rectangular, freeform, window, or full-screen snips.
-
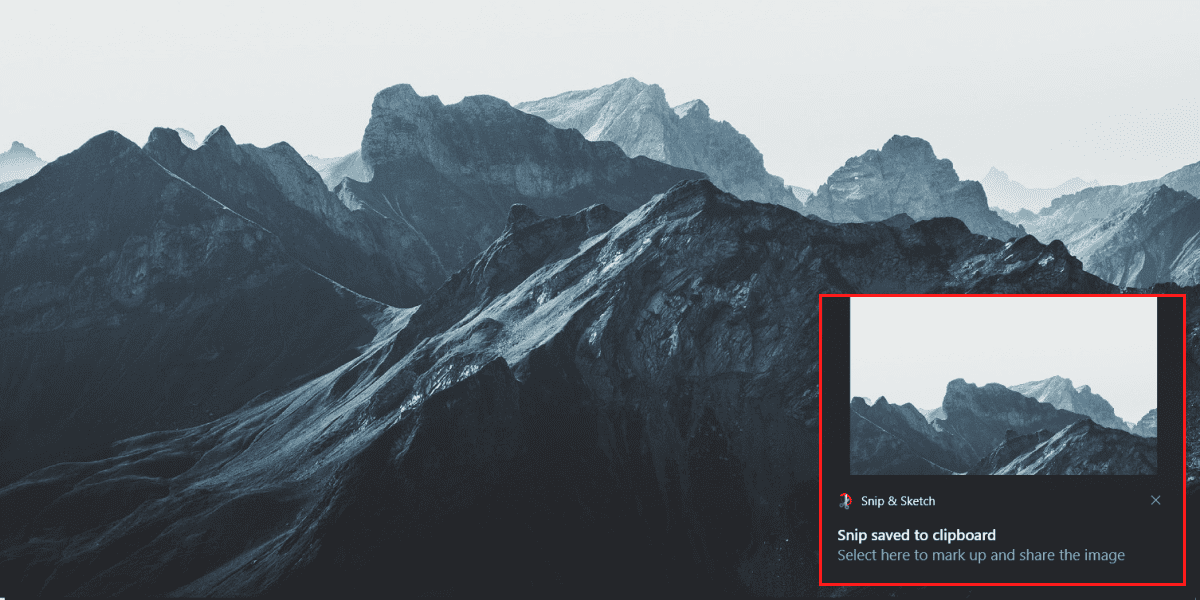
Once you select your snip type, the screen will dim, and you can capture the desired area. The screenshot will then be copied to your clipboard and a notification will appear, which you can click to open the screenshot in the Snip & Sketch app.
-
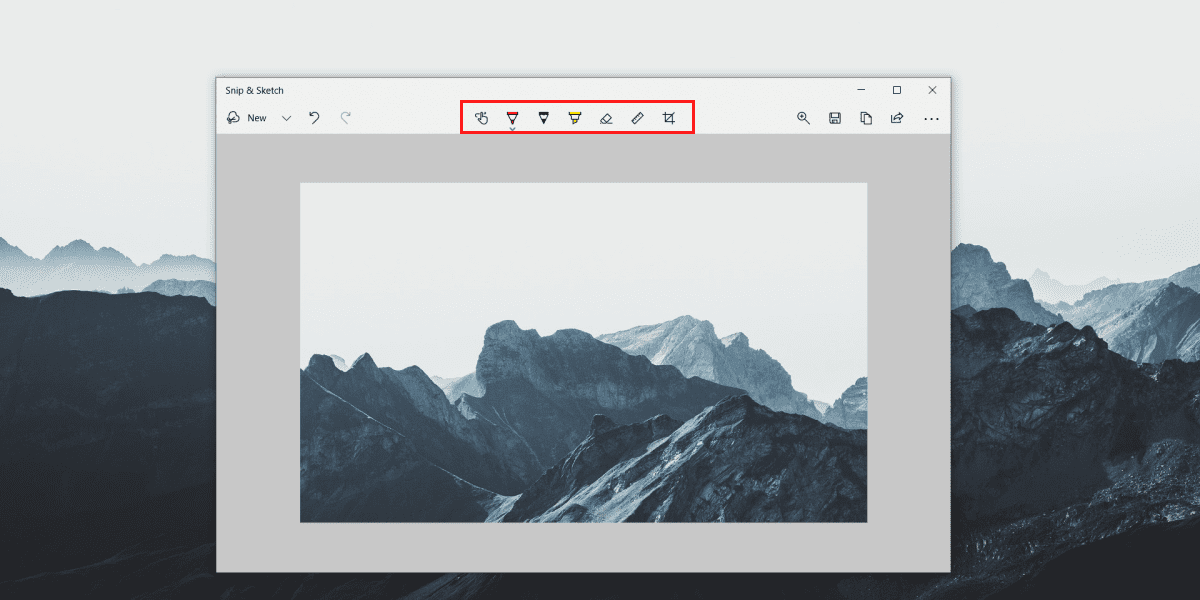
In the app, you have the option to annotate, edit, or share your screenshot directly. You can also save it for future use.
Snip & Sketch enhances the screenshot experience by combining the capture, edit, and share steps into a seamless workflow. It’s perfect for users who regularly work with screenshots and need an efficient way to manage them. Whether you’re a freelancer documenting your work, a developer capturing bug reports, or just someone who likes to keep visual records, Snip & Sketch is a versatile tool for all your screenshot needs.
Conclusion
Understanding how to capture a screenshot on Windows is more than a convenience—it’s a necessity in our increasingly digital workspace. From quick captures using the Print Screen key to more detailed snaps with tools like Screenpixel, Windows offers a variety of ways to meet this need. Each method serves different purposes, whether you’re aiming for speed with Screenpixel or flexibility with the Snipping Tool (Snip & Sketch). Embracing these tools not only streamlines your workflow but also enhances your ability to communicate visually. By integrating these screenshot methods into your daily tasks, you ensure that capturing and sharing screen content is always at your fingertips, quick, easy, and efficient.
FAQ
-
How do you screenshot on a computer?Whether you're using a desktop or a laptop, Windows provides multiple ways to take a screenshot: through the Print Screen key for full-screen captures, the Snipping Tool (Snip & Sketch) for custom or quick edits and shares, and specialized software like Screenpixel for enhanced functionality.
-
How can you take a screenshot without a keyboard?Screenpixel and Snipping Tool (Snip & Sketch) offer user-friendly interfaces that allow you to capture screenshots without relying on keyboard shortcuts. These tools are especially useful for touchscreen devices or when you prefer using a mouse.
-
How do I screen capture on PC and save it to the clipboard?Pressing the Print Screen key (PrtScn) captures your entire screen and saves it to the clipboard. For quick access and additional features like editing and sharing, you can use Screenpixel or Snipping Tool (Snip & Sketch), which also save captures to the clipboard and provide easy sharing options.
-
How do you take a screenshot on a PC laptop?The methods to take a screenshot on a PC laptop are the same as on a desktop—using the Print Screen key, Screenpixel, the Game Bar, the Snipping Tool (Snip & Sketch), depending on your specific needs and preferences.
-
How do I take a screen picture and edit it?Snipping Tool (Snip & Sketch) is the go-to tool for taking, editing, and sharing screenshots on Windows. It allows you to capture your screen easily and then edit the image directly within the app. For more robust editing features, screenshots can be opened in an image editing tool of your choice.

Hi! How can I capture computer screen image on my Windows 11 PC?
Hey! You can use the Screenpixel, it’s a handy desktop screenshot tool:)
Oh, I didn’t know Windows 11 had that. Thanks!
This is not a built-in Windows tool, you need to download it first:))
guys what’s the best way to take a picture on computer screen while gaming?
Hi there! For that, you can use the Xbox Game Bar. Just press Windows + G to capture the PC screen image.
Perfect, that sounds easy!))
You’re welcome!
I need to capture computer screen image on my Dell laptop. What do you suggest?
Hi! Have you tried using the Print Screen button?
yeah but I need something more precise
Then use Screenpixel. It’s an excellent desktop screenshot tool for detailed captures.
thanks, I’ll give that a shot!))
Hello! How do I capture a computer screen image and save it automatically?
Use Windows + Print Screen. It captures PC screen image and saves it automatically in the Screenshots folder.
That’s convenient! No need to paste it anywhere
Exactly, it’s quick and easy!))
What’s up! Can you recommend a good desktop screenshot tool for editing screenshots?
Hello! Lightshot is a great option. It lets you capture computer screen image and edit it right away.
Does it work on both Windows and Mac?
Yes, it does. It’s very versatile.))
I’ll definitely try that. Thanks for the suggestion!
Good morning! How can I capture picture on PC without downloading any software?
GM! If you’re on Windows, just press the Print Screen key. It’s an easy screenshot for PC.
Do I need to paste it somewhere?
Yes, paste it into Paint or any image editor. 🙂
i’m struggling with how to take a computer screenshot Windows 10. Any advice?
Hello. The easiest way is to press Windows + Print Screen. It saves the computer screen screenshot automatically.
thx! I’ve been doing it the hard way, I guess.
Can someone explain how 2 take screenshot a on PC? I’m new to this.
Hi! You can use the Snipping Tool, which is a computer screenshot tool that lets you choose what part of the screen to capture.
Oh, that sounds perfect! Idk about that tool.
Hi there. What’s the fastest way to capture the screen on computer during a video call?
Hi! Use Alt + Print Screen to capture just the active window. It’s great for a quick computer capture screen 😉
I’ll try that. Thanks for the tip!
No problem!
is there an easy screenshot PC while watching a video?
Hello! For Windows, press Windows + G to bring up the Game Bar. It’s an easy screenshot Windows option, even for videos.
I didn’t know you could do that! Awesome.
hi. how do I crop the PC screen after taking a screenshot?)
Hi! Take the screenshot first, then open it in Paint. You can easily crop the computer monitor screenshot there.
i’ve been looking for an easy way to do that. Thx!
Can anyone recommend a good tool to capture the screen on computer?
Hi! You should try Snip & Sketch. It’s a versatile computer screenshot tool.
does it work on Windows 11?
Yes, it’s perfect for desktop screenshot Windows 11. :)))
i’m still using Windows 7. How do I take a computer screenshot Windows 7?
You can press Print Screen, but you’ll have to paste it somewhere like Paint to save the computer PC screenshot.
Old school, but it works. xD thanks for the help.
What’s the best method to capture picture on PC for a tutorial?
Use the Snipping Tool for a detailed computer capture screen.
Is it good for step-by-step images?
Absolutely, it’s perfect for that!
hi all. I’ve heard there’s a new way to capture screen on computer with Windows 11. Is that true?
Hi! Yes, Windows + Shift + S is the shortcut. It’s an easy way to screenshot on PC with various options.
that’s great, I’ll start using that!
How can I do screenshot on my computer without using any external tools?
Just press the Print Screen key. It’s a quick way to capture the whole screen.
and where does it go after that?
You’ll need to paste it into Paint or another image editor. 🙂 🙂
qq. How can I screenshot on PC when I’m working on multiple windows?
qq! Use Alt + Print Screen to capture only the active window.
Thanks, that’ll save me a lot of time!
How do I make screenshot on PC and save it immediately?
Use the Windows + Print Screen shortcut. It’ll automatically save the screenshot to your Pictures folder.
that’s convenient. No need to paste anywhere!!!
Hellow, how do u take screenshots on a computer if you want to capture a specific area?
You can use the Snipping Tool to select the exact area you want to capture.
how do I take screenshots on computer while gaming?
Press Windows + G to open the Game Bar, then select the camera icon to capture your screen.
Omg, that’s pretty handy for gaming!
hi? how can u take a screenshot on a computer if the Print Screen key isn’t working?
HI! You can use the Snip & Sketch tool. It’s built into Windows and doesn’t require the Print Screen key.
perfect, I’ll use that instead.
how do I screenshot my PC screen quickly for a report?
Just press Windows + Print Screen. It’s the fastest way to get it done.
and does it save automatically?
Yes, it saves directly to your Screenshots folder.
Gm. How do you make a screenshot on PC without using any software?
GM! Press the Print Screen button and paste the screenshot into an editor like Paint.
Simple and effective, thanks!
How do I do a snapshot on my computer if I’m using Windows 10?
Press Windows + Shift + S to select the area you want to capture.
That’s a new one for me, I’ll try it out!
how do you take a screenshot from a computer running Windows 7?
Hello. Use the Snipping Tool, it’s great for quick captures.
I thought that was only on Windows 10. Good to know!
Hi! How do u take a SS on a computer and share it right away?
Hi! After taking the screenshot, just paste it into an email or chat. 😉
So easy, thanks!
how do u take screen shots on a computer if you’re in a rush?
Press Windows + Print Screen. It’s the quickest way, and it saves automatically.
that’s exactly what I needed!
Hello. How do u do a screenshot on a computer and then edit it?
Hello! Take the screenshot, then open it in Paint or Snip & Sketch for editing.
Got it, I’ll use Paint for now.)))
how do I screenshot on my computer windows 10 without the keyboard?
Use the Snipping Tool, you can find it by searching in the Start menu.
didn’t know i could do that!
How can i get a screenshot on my pc while using dual monitors?
Press Windows + Print Screen to capture both screens at once.
And can I edit it afterward? :3
Yes, you can crop pc screen in Paint or any other editing tool. 😉
How do I do a computer screenshot if I only want a part of the screen?
Windows + Shift + S lets you select exactly what you want to capture.
thanks, I’ll give that a try
how do I snapshot my computer screen when I’m watching a video?
Use the Game Bar with Windows + G. It’s great for video captures. 🙂 🙂
cool, I didn’t know that worked for videos too!!!
Hey. How can screenshot on pc be done easily?
Hey! Just press Print Screen, then paste it into any image editor.
simple and straightforward, thanks!
How do I copy my screen on a PC to send to a friend??
Press Print Screen, paste it into Paint, and save it as a file to send. )
Thanks, that’s really helpful!!
Hi! how do u screenshot on this computer if I want to include the taskbar?
Hi! Use the Print Screen button. It captures everything, including the taskbar.
great, that’s exactly what I needed.
How to do a screenshot of your computer screen when working on multiple windows?
Use Alt + Print Screen to capture just the active window. It’s how to fast screenshot on ))))
PC without capturing everything
how to copy screen on PC windows 10 if I need a full-screen shot?
Press Windows + Print Screen to capture and save it directly to your Screenshots folder.
that’s handy. I always forget the shortcut!
Hey!! how to get a screenshot on desktop without using any software?
Hey!!! Simply press the Print Screen key, then paste it into Paint. That’s the easiest way you can how to get PC screenshot. :3
how to do a screenshot on a pc computer for specific areas?
You can use Windows + Shift + S. It lets you select the exact area you want to capture screen on PC Windows 10.
GA! how to do a screen on a pc if I want to capture just a part of it?
Ga! The Snipping Tool is perfect for this. You can choose the area you want to capture. ;))
how to make a screenshot on pc windows 11 if i’m working on a document?
Press Windows + Print Screen to capture your whole screen, then paste it into your document.
Hey. How to do a screenshot on this computer if I want to share it immediately?
Hey! Take the screenshot with Print Screen, then paste it directly into an email or chat.
That’s a quick way to get a screenshot on PC Windows 7 too, right? 🙂
Yes, it works for Windows 7 as well.
How to cap screen on PC when I need a quick snap?
Just hit Print Screen, then paste it where you need it. That’s how to do a SS on PC in no time. 😉
How to do screenshot on desktop computer when running a presentation?
Use Windows + Print Screen to capture the full screen instantly.
Great tip! That’s how to make a screenshot on PC Windows 10 as well, right?
Exactly, the process is the same.
Hi!! How to capture a picture on PC when I’m editing photos?
HI!!! Use the Snip & Sketch tool for more precise captures. It’s the best way how to do capture screen on PC when you need accuracy.
how to take a screenshot of my PC screen without using any tools? )))
Press Windows + Print Screen. That’s how to perform a screenshot on PC quickly.
does it save automatically? )))
Yes, it’s saved directly to your Screenshots folder.
wup! How to screenshot things on a computer when browsing the web?
Wup! Use Windows + Shift + S to select the part of the web page you want to capture. It’s an easy way to screenshot a web page on a computer.
That’s perfect for my project!
how to take a picture on a PC laptop without a camera?.
You can’t take a live photo without a camera, but to take a screenshot on this PC, just press Print Screen.
thanks, that’s what I needed.!
Hello. How to screenshot a web page on a computer if it’s long?
Hello! Use the Snip & Sketch tool for scrolling captures, or press Windows + Shift + S to capture what’s visible. It’s how to screenshot a web page on PC effectively.
how to take a photo on a computer screen if I want to send it to someone? ))
Capture it with Print Screen, then paste it into an email. That’s how to send a screenshot on a computer quickly.