
Windows 10/11 offers a built-in solution with its Snipping Tool, featuring handy keyboard shortcuts that make screen capturing a breeze. This guide delves into the world of Microsoft Snipping Tool shortcuts on Windows, ensuring you can leverage these tools to enhance your productivity.
Snipping Tool Shortcuts
|
Action
|
Shortcut
|
Description
|
|
Open Snipping Tool
|
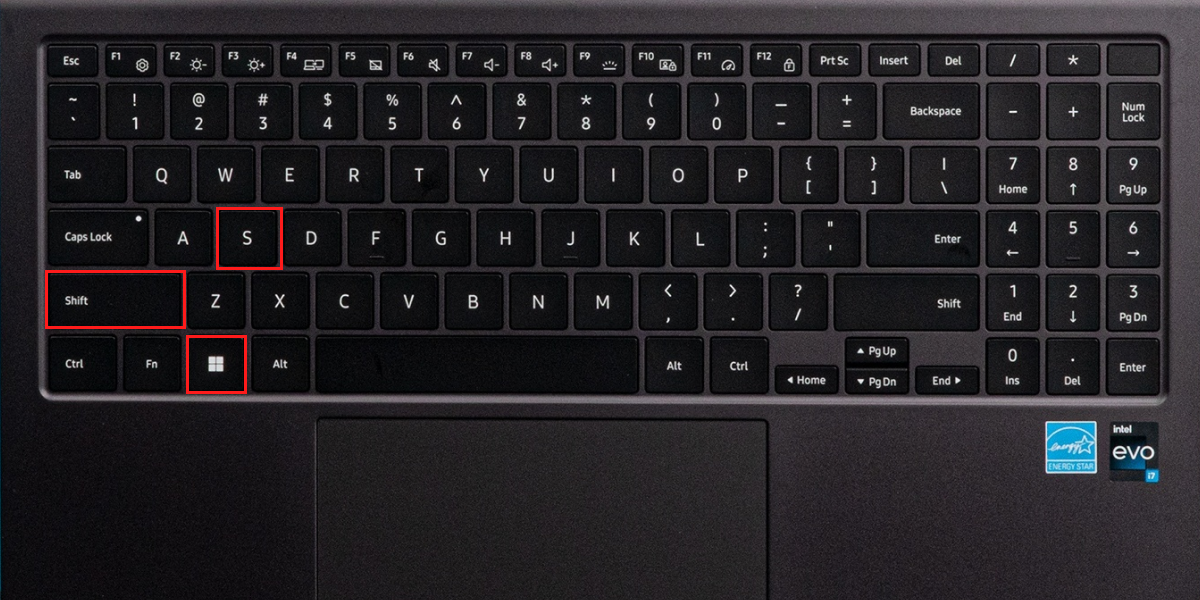
Win + Shift + S
|
Activates the snipping bar for selecting the type of snip
|
|
Rectangular Snip
|
Shift + Arrow keys (After activating Snipping Tool)
|
Allows you to select a rectangular area for capturing
|
|
Free-form Snip
|
(No direct shortcut, choose from Snipping Tool bar)
|
Enables drawing a freeform shape around an object to snip
|
|
Window Snip
|
(No direct shortcut, choose from Snipping Tool bar)
|
Captures a specific window or dialogue box
|
|
Full-screen Snip
|
PrtScn (Without opening Snipping Tool)
|
Captures the entire screen immediately
|
|
Close Snipping Tool
|
Esc (After activating Snipping Tool)
|
Exits snipping mode without taking a screenshot
|
Note: The shortcuts provided are primarily for initiating and navigating the Snipping Tool's features. The Snipping Tool must be active or in standby mode for these shortcuts to work effectively.
What is Snipping Tool on Windows 10/11
The Snipping Tool, a built-in screenshot utility for Windows 10 and 11, enables users to capture specific parts of their screen, such as an open window, a rectangular or free-form area, or the entire screen. This tool, present in several Windows versions, allows for easy screenshot taking and basic editing like annotations and highlights, without needing third-party software.
While Windows 10 introduced basic editing capabilities, Windows 11 brought the Snip & Sketch tool, enhancing editing and annotation functions yet kept the original Snipping Tool for its simplicity. The tool is essential for quickly capturing screen segments for various purposes, emphasizing Microsoft’s commitment to integrating useful screenshot tools natively for both personal and professional use. Instructions on accessing and using the tool, along with its features, would provide practical guidance for users.
Use Snipping Tool Keyboard Shortcuts to Take Screenshots
Efficiency in screen capture is paramount, especially for professionals who require quick access to screenshot functionality. Utilizing keyboard shortcuts for the Snipping Tool can significantly reduce the time and effort involved in taking screenshots:
-
Initiating a Screen Capture: The Win + Shift + S shortcut key for Snipping Tool in Windows is your gateway to activating the Snipping Tool's selection modes.
-
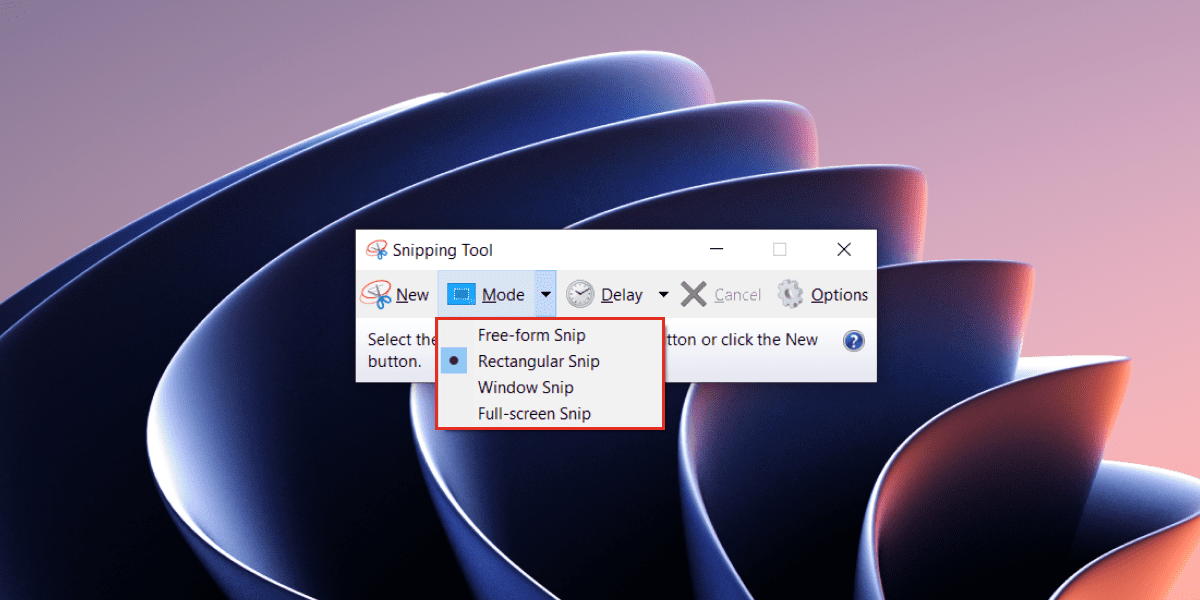
Types of Snips: Whether you need a rectangular snip for documentation, a free-form snip for creative captures, a window snip for app-specific screenshots, or a full-screen capture for comprehensive screen content, the Snipping Tool accommodates all these needs with intuitive shortcuts and options.
-
Efficiency Tips: Familiarizing yourself with these shortcuts can dramatically streamline your workflow. Practice using them in various contexts to enhance your screen capture proficiency.
Alternative Methods to Take Screenshots with Snipping Tool
While the Snipping Tool provides a robust method for taking screenshots, alternative approaches and tools can offer additional convenience and functionality:
-
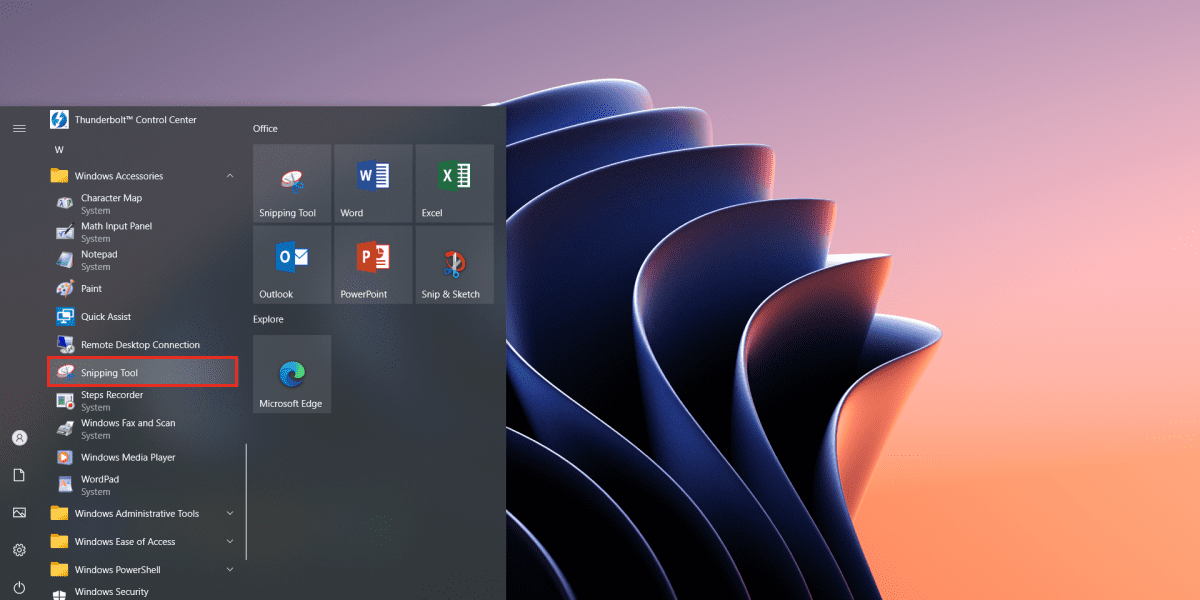
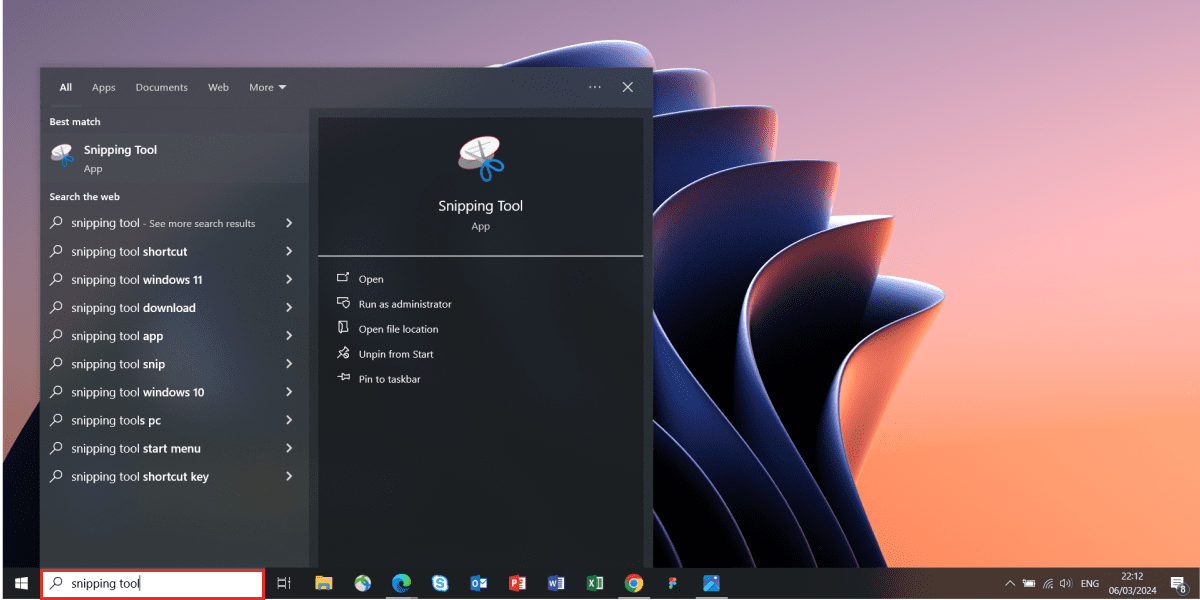
Manual Capture: For users who prefer navigating through interfaces, the Snipping Tool’s UI allows for manual selection and capture of screenshots, accessible via the Start menu or a quick search.
-
Screenpixel: Positioning itself as a superior alternative, Screenpixel simplifies the screenshot process through its innovative two-mouse-button functionality, allowing for quick area selection and instant copying of screenshot links to the clipboard. Its quick download and installation process make it an ideal choice for those seeking efficiency and simplicity in screen capture tasks.
Conclusion
The ability to swiftly capture what’s on your screen is more than a convenience—it’s a critical component of modern digital workflow. For Windows 10/11 users, mastering snipping tool shortcuts represents a significant step towards achieving this efficiency, enabling quick and precise screen captures that save valuable time. This guide has explored the myriad of shortcuts available, as well as the utility and versatility of the Snipping Tool itself. Beyond the built-in capabilities of Windows, we introduced Screenpixel, a tool that further simplifies the screenshot process with its innovative features, catering especially to those who prioritize speed and convenience.
FAQ
-
What are the optimal Snipping Tool Shortcuts?The optimal snip tool shortcuts keys in Windows 10/11 are:
● Win + Shift + S to open the snipping bar and start a new snip.
● Shift + Arrow keys to adjust the size of a rectangular snip.
● PrtScn to capture the entire screen. These shortcuts provide quick access to the Snipping Tool's functionality, enhancing your screenshot-taking process. -
Where do screenshots go in Windows 10/11?Screenshots taken using the Snipping Tool can be saved to a location of your choice once you capture them. By default, screenshots captured with the PrtScn key or Win + PrtScn are saved in the Screenshots folder within the Pictures library. For screenshots taken with Win + Shift + S, they are copied to the clipboard and can be pasted into a document or image editor of your choice.
-
What is the difference in the Snipping Tool on Windows 10 and 11?The Snipping Tool in Windows 10 offers basic snip types—free-form, rectangular, window, and full-screen. With Windows 11, the Snipping Tool was updated to integrate features from the Snip & Sketch app, providing more annotation tools and a slightly improved user interface. In addition, Windows 11 introduces an upgraded Snipping Tool that goes beyond static screenshots, offering capabilities for video recording. This enhancement is a game-changer for users looking to capture dynamic content directly from their screens.
-
Can I use keyboard shortcuts to open Screenpixel?Screenpixel primarily focuses on simplicity and efficiency, utilizing the innovative two-mouse-button click method for initiating screen captures. While it doesn't rely on traditional keyboard shortcuts for its operation, this approach allows for a quick, intuitive screen capture process, emphasizing ease of use over memorization of key combinations.
